
 Apple Login :
If you haven’t Firebase Project Account ? Click here for create project see the steps show in Firebase Setup.
Follow below steps for Apple Login in your project:
- Go to Firebase https://firebase.google.com/.
- Now click on Get Started button
- Go to Firebase https://firebase.google.com/.
- Now click on Get Started button
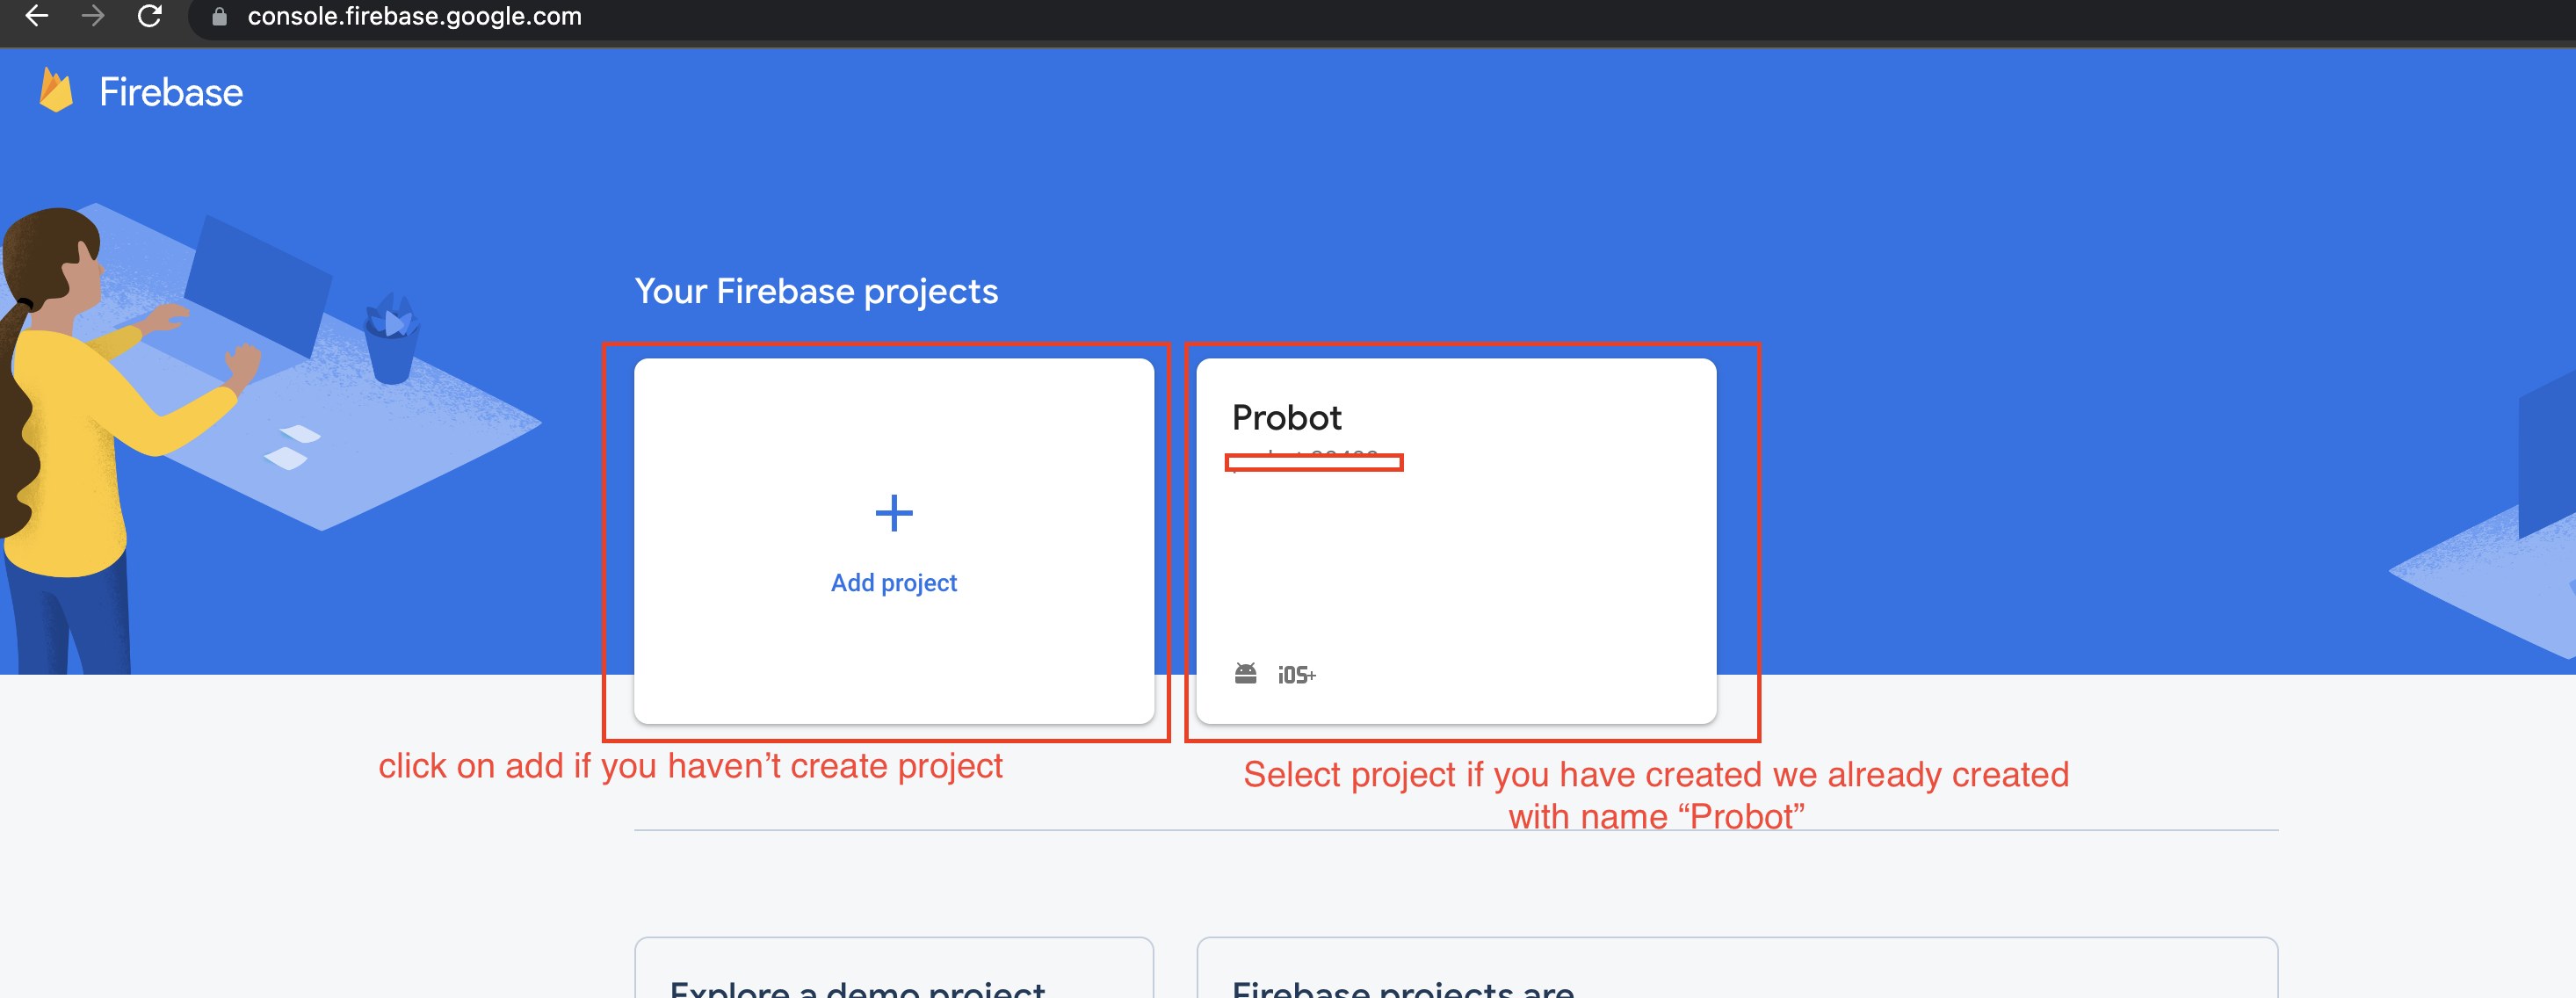
- Now select your project if created or create your project by click on + Add Project and
google-services.json
NOTE : How to create Project and set google-services.json setup show in above Firebase Setup -
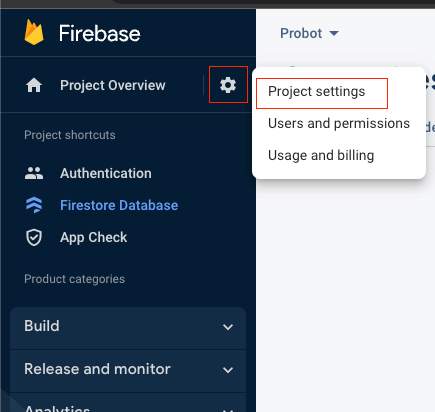
On left hand side panel click on setting icon. On click Setting
button pop open open.
In that click on Project Settings
- Scroll down click on your package and add SHA-1 and SHA26 Key for debug and release.
NOTE : How to generate SHA-1 and SHA26 steps are mention above. You can see in document left hand menu panel and click on Firebase SHA Key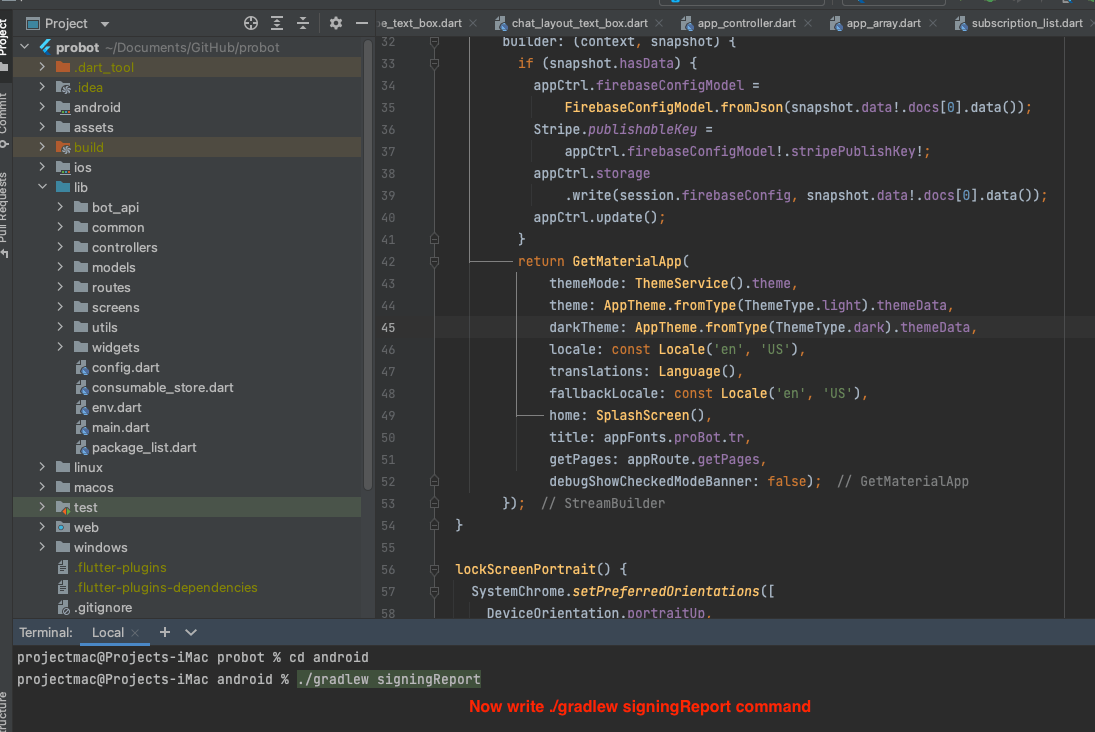
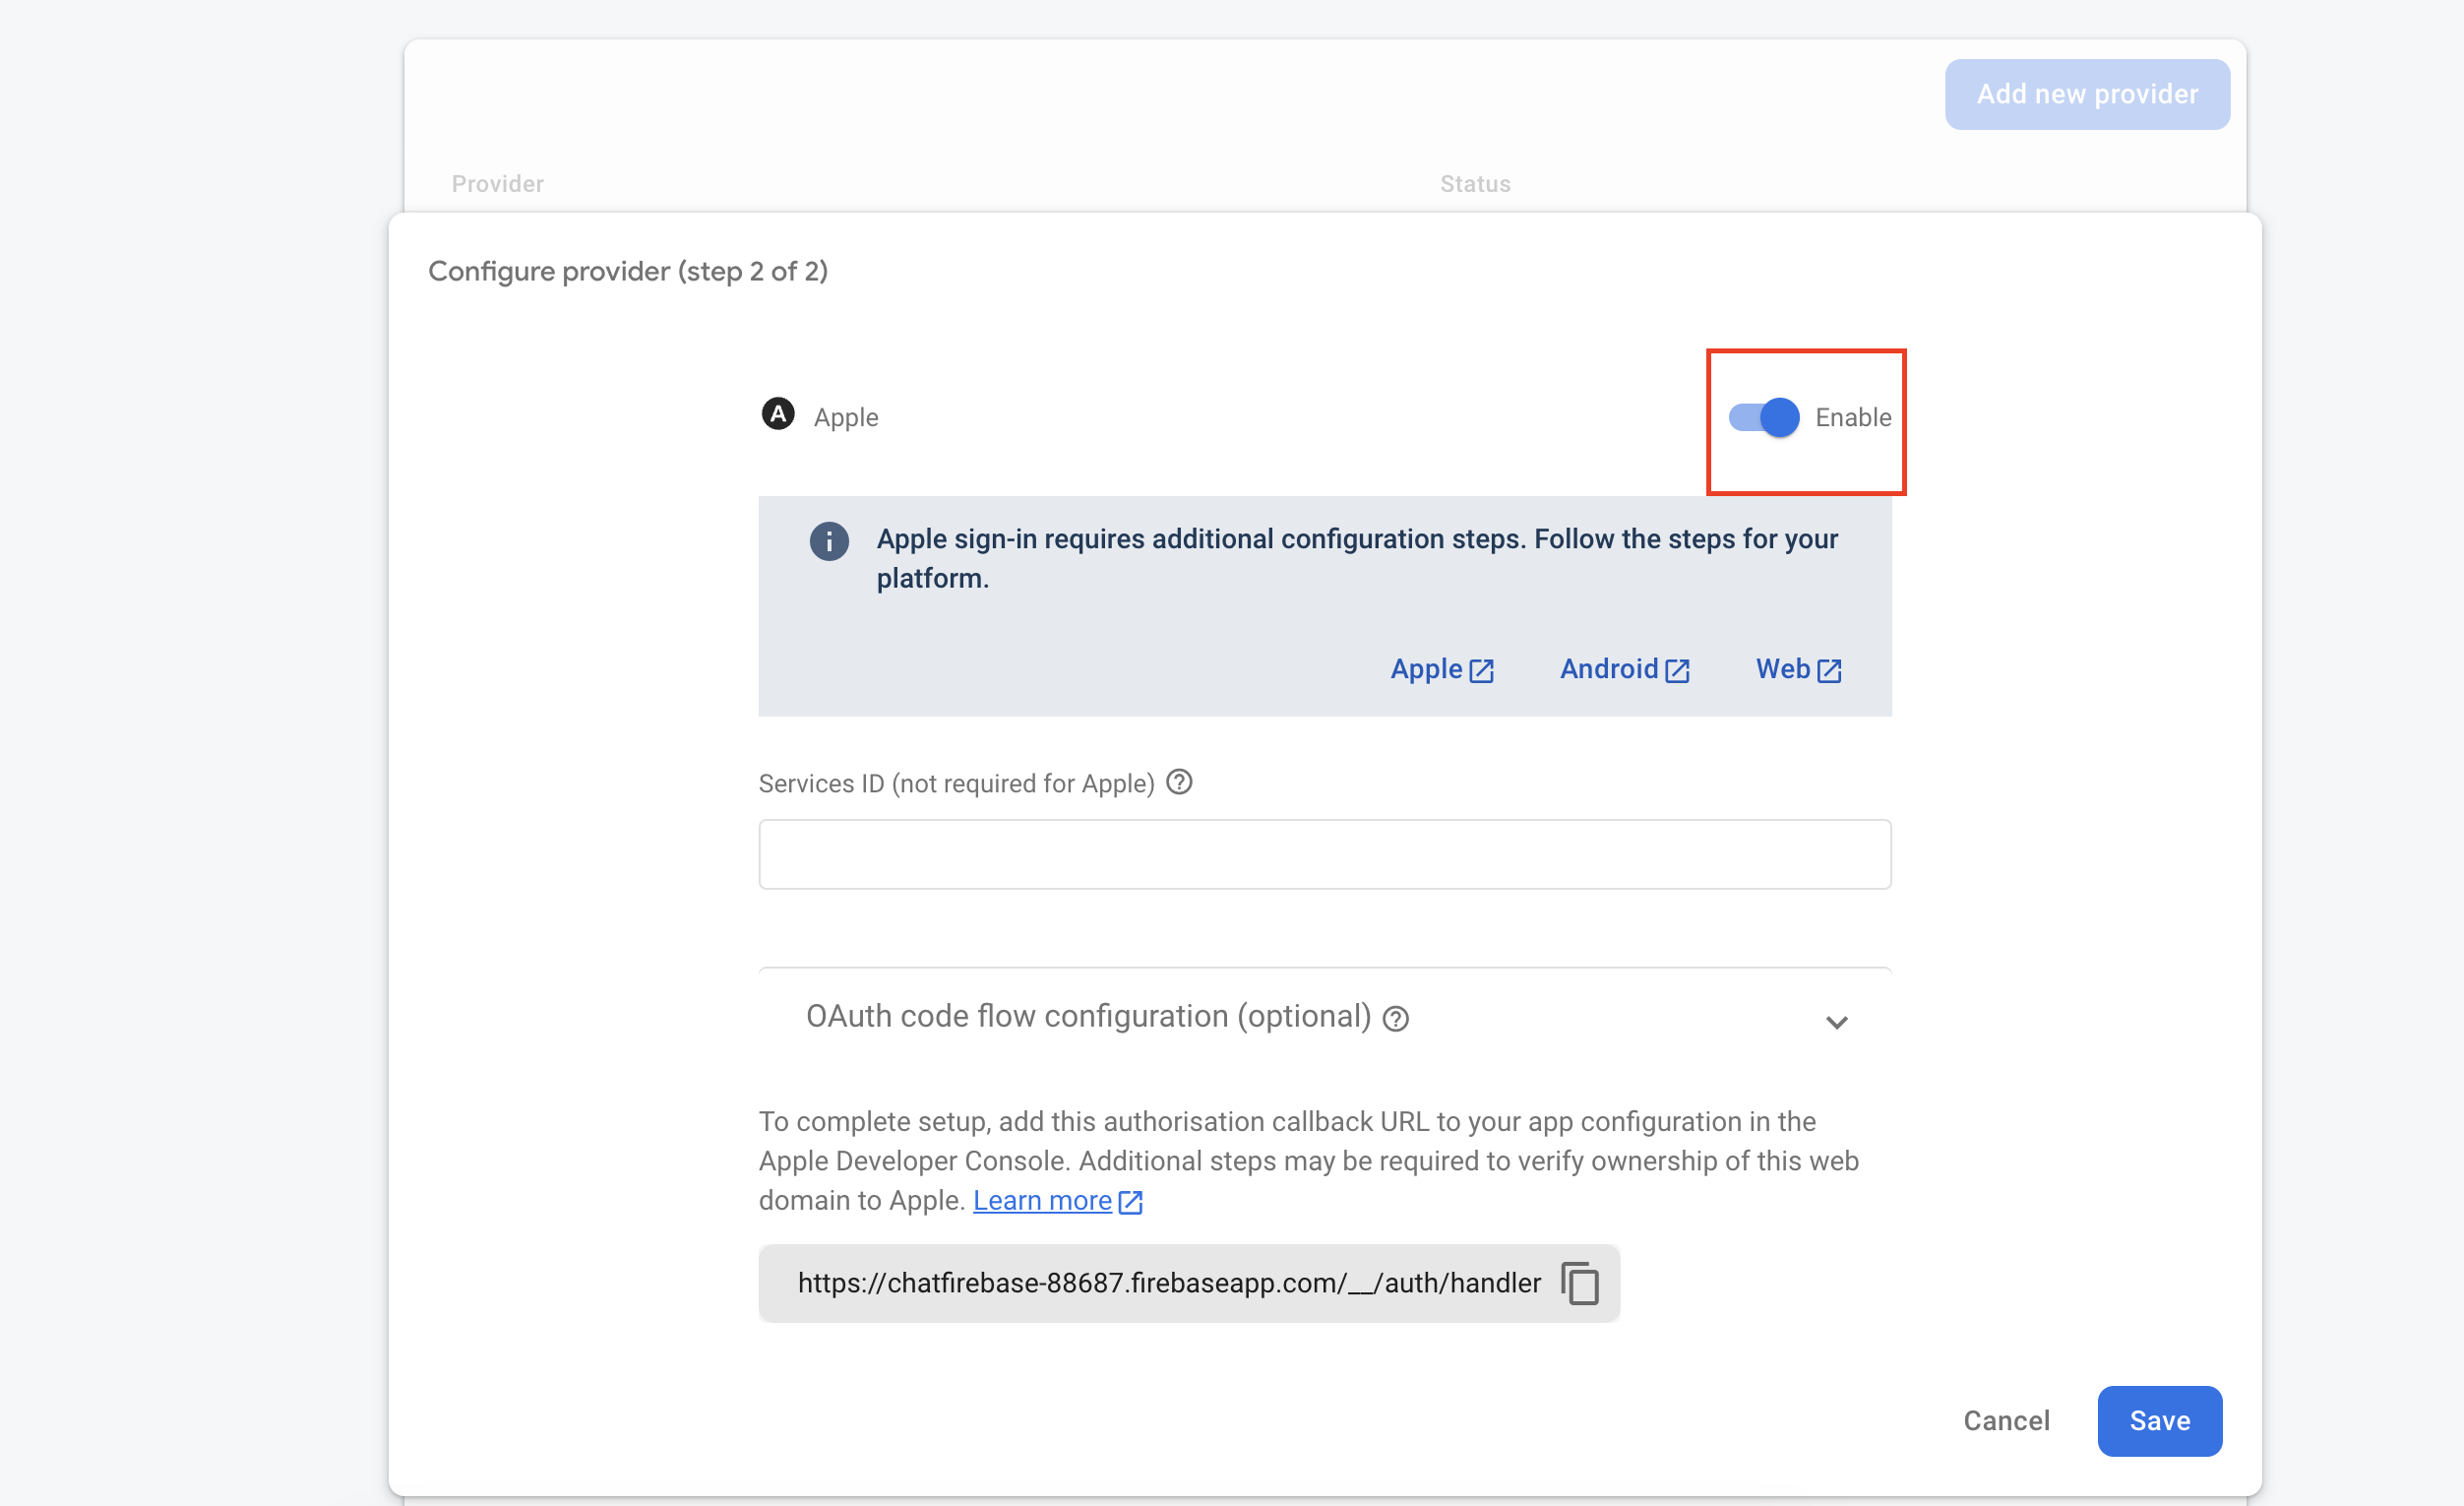
- Now click on Apple button for add provider.
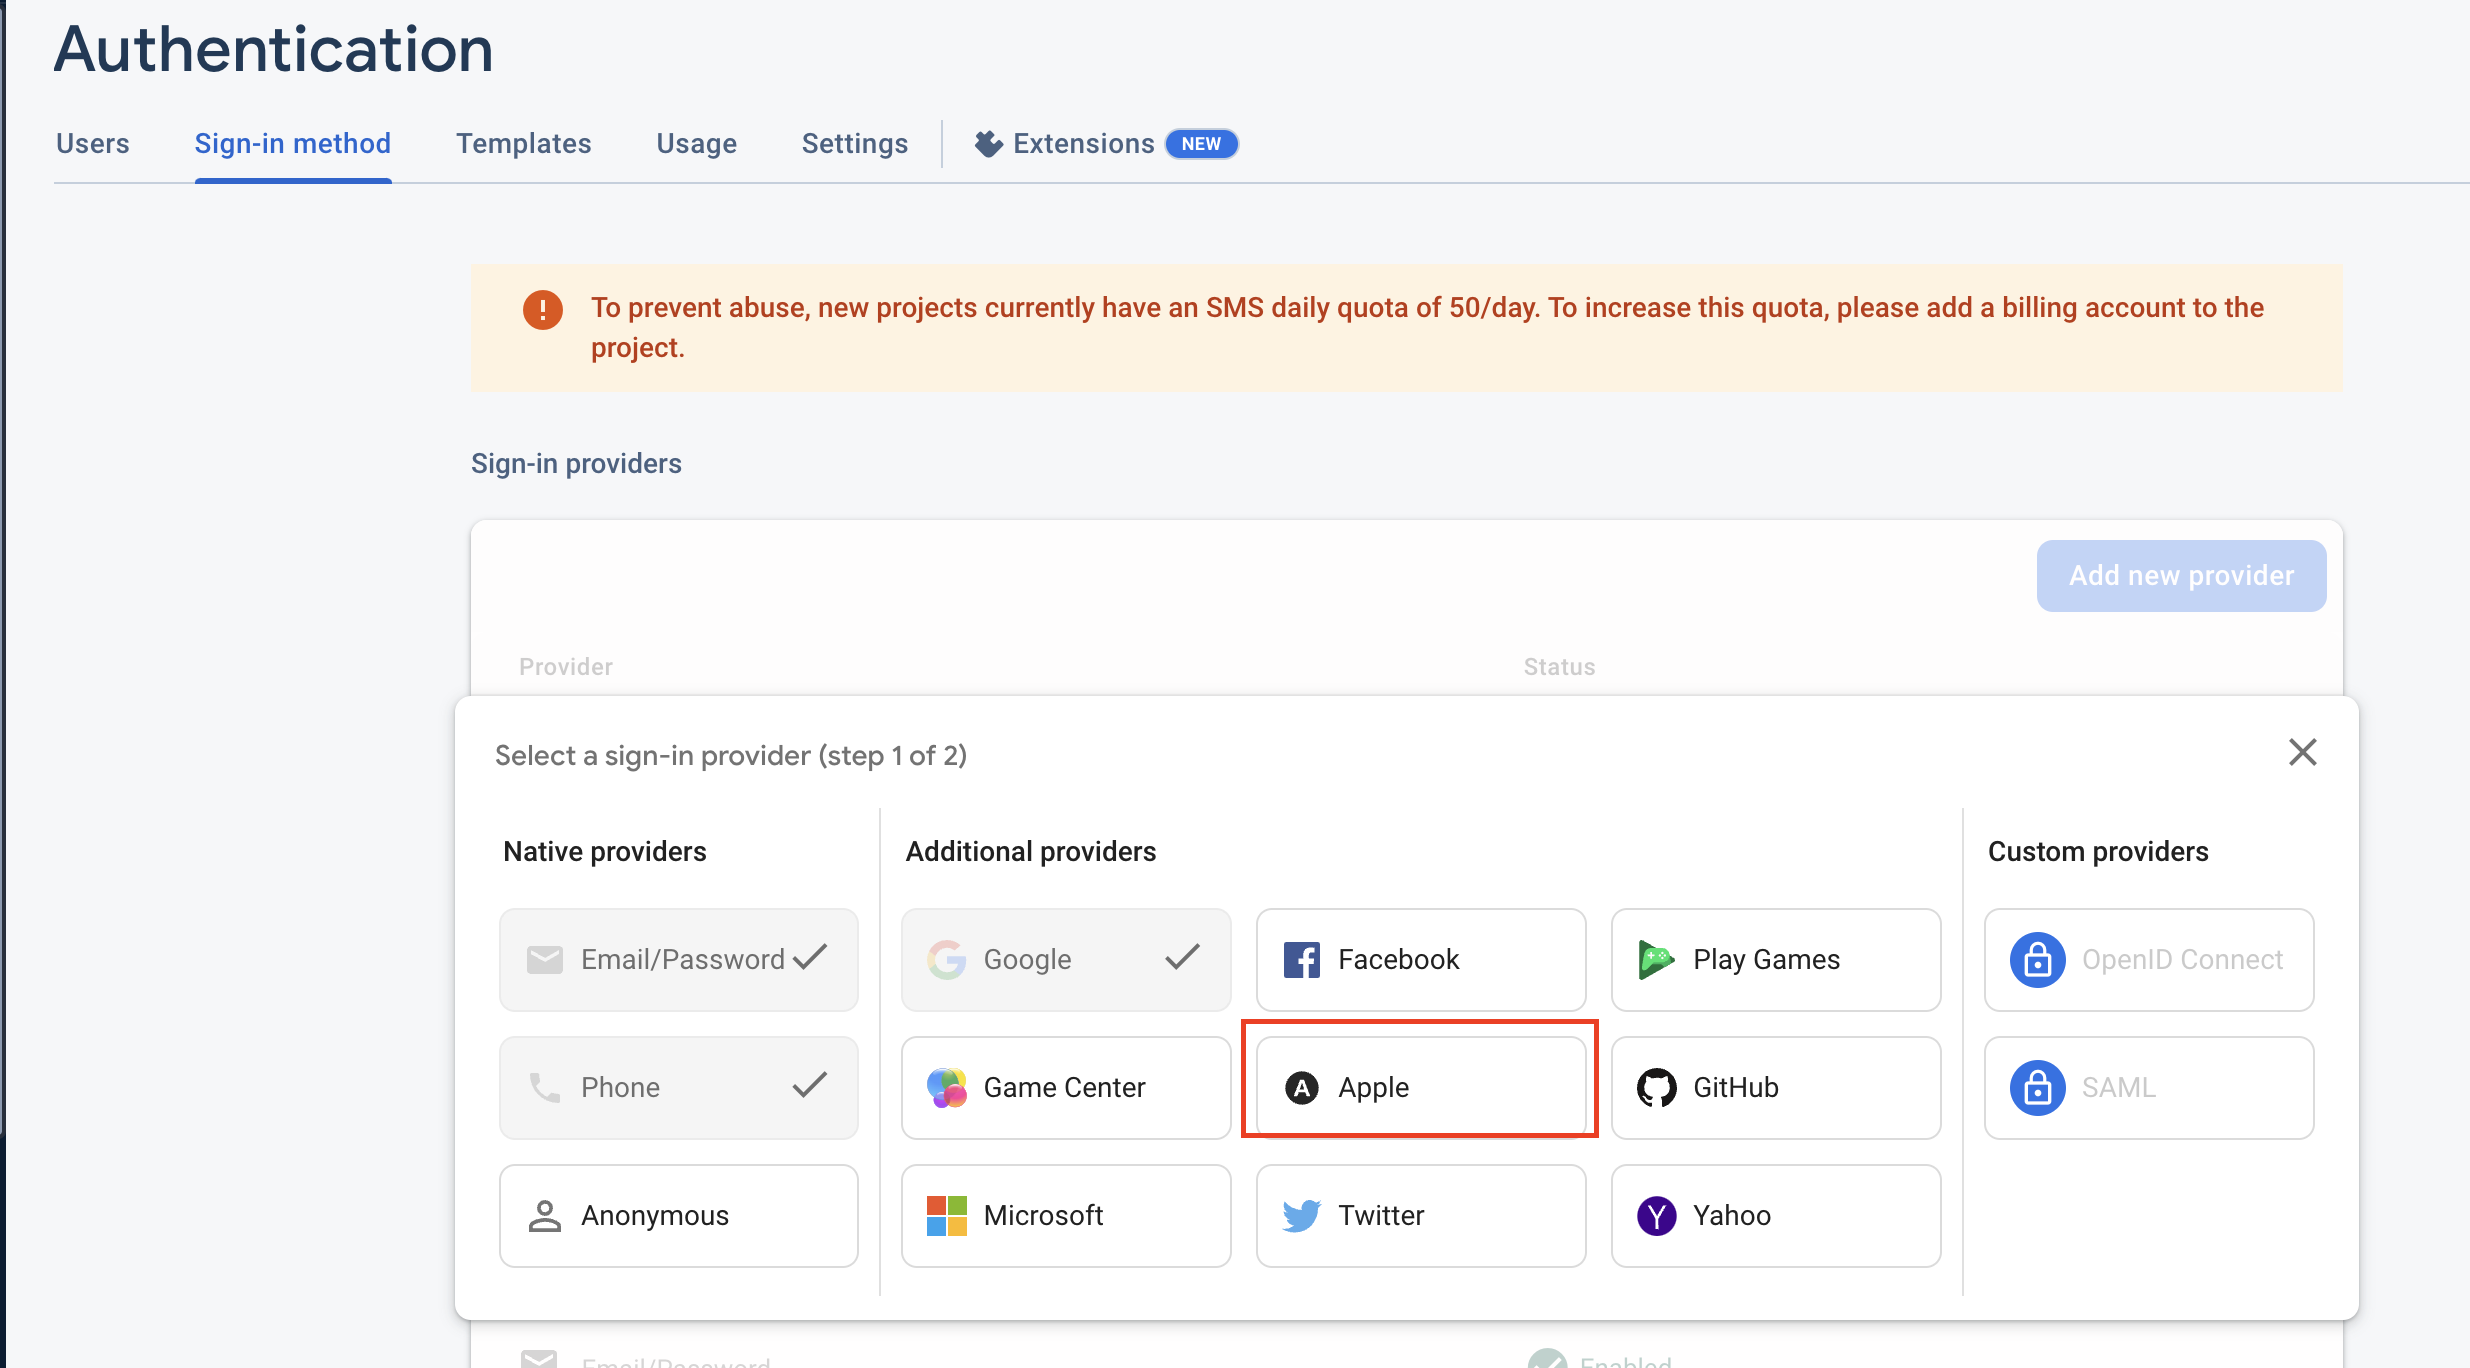
- Now Enable the toggle give support apple login and click on Save> button.
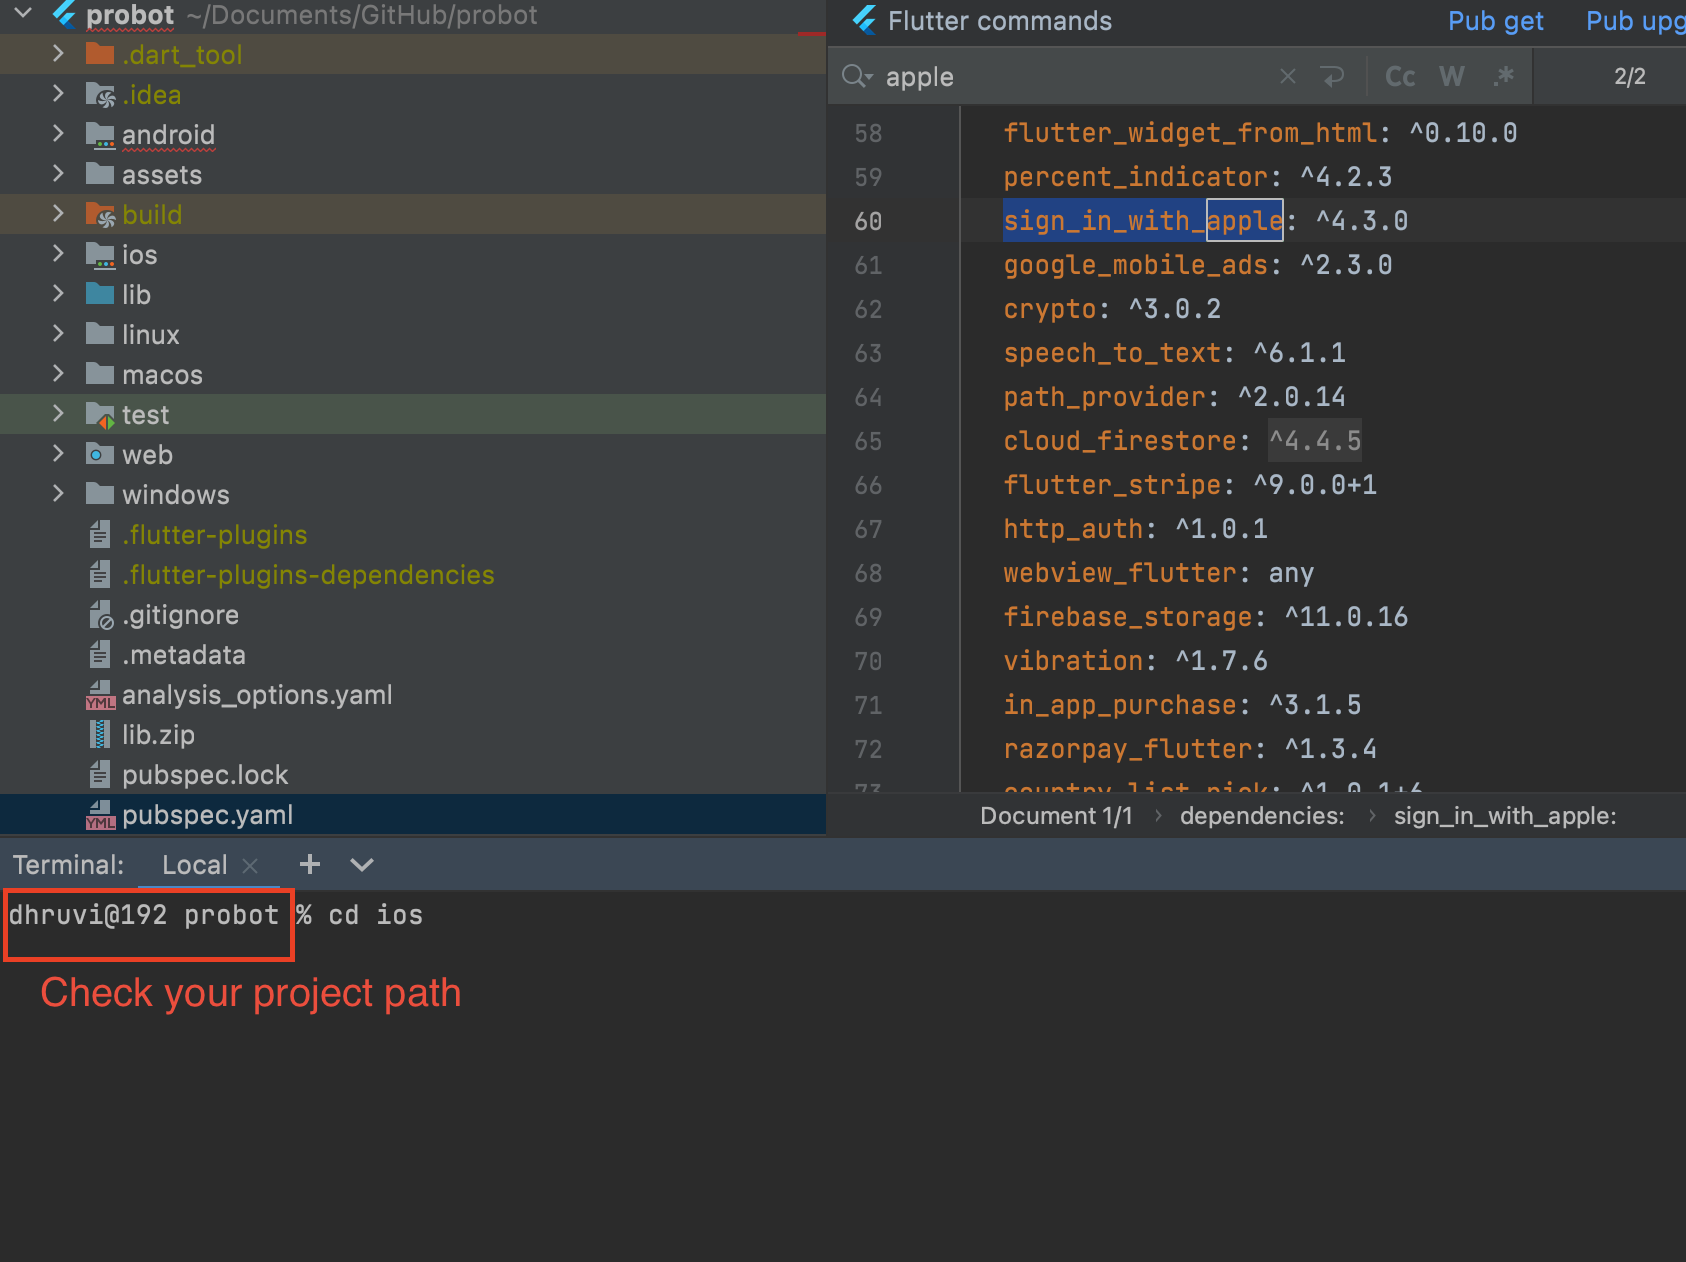
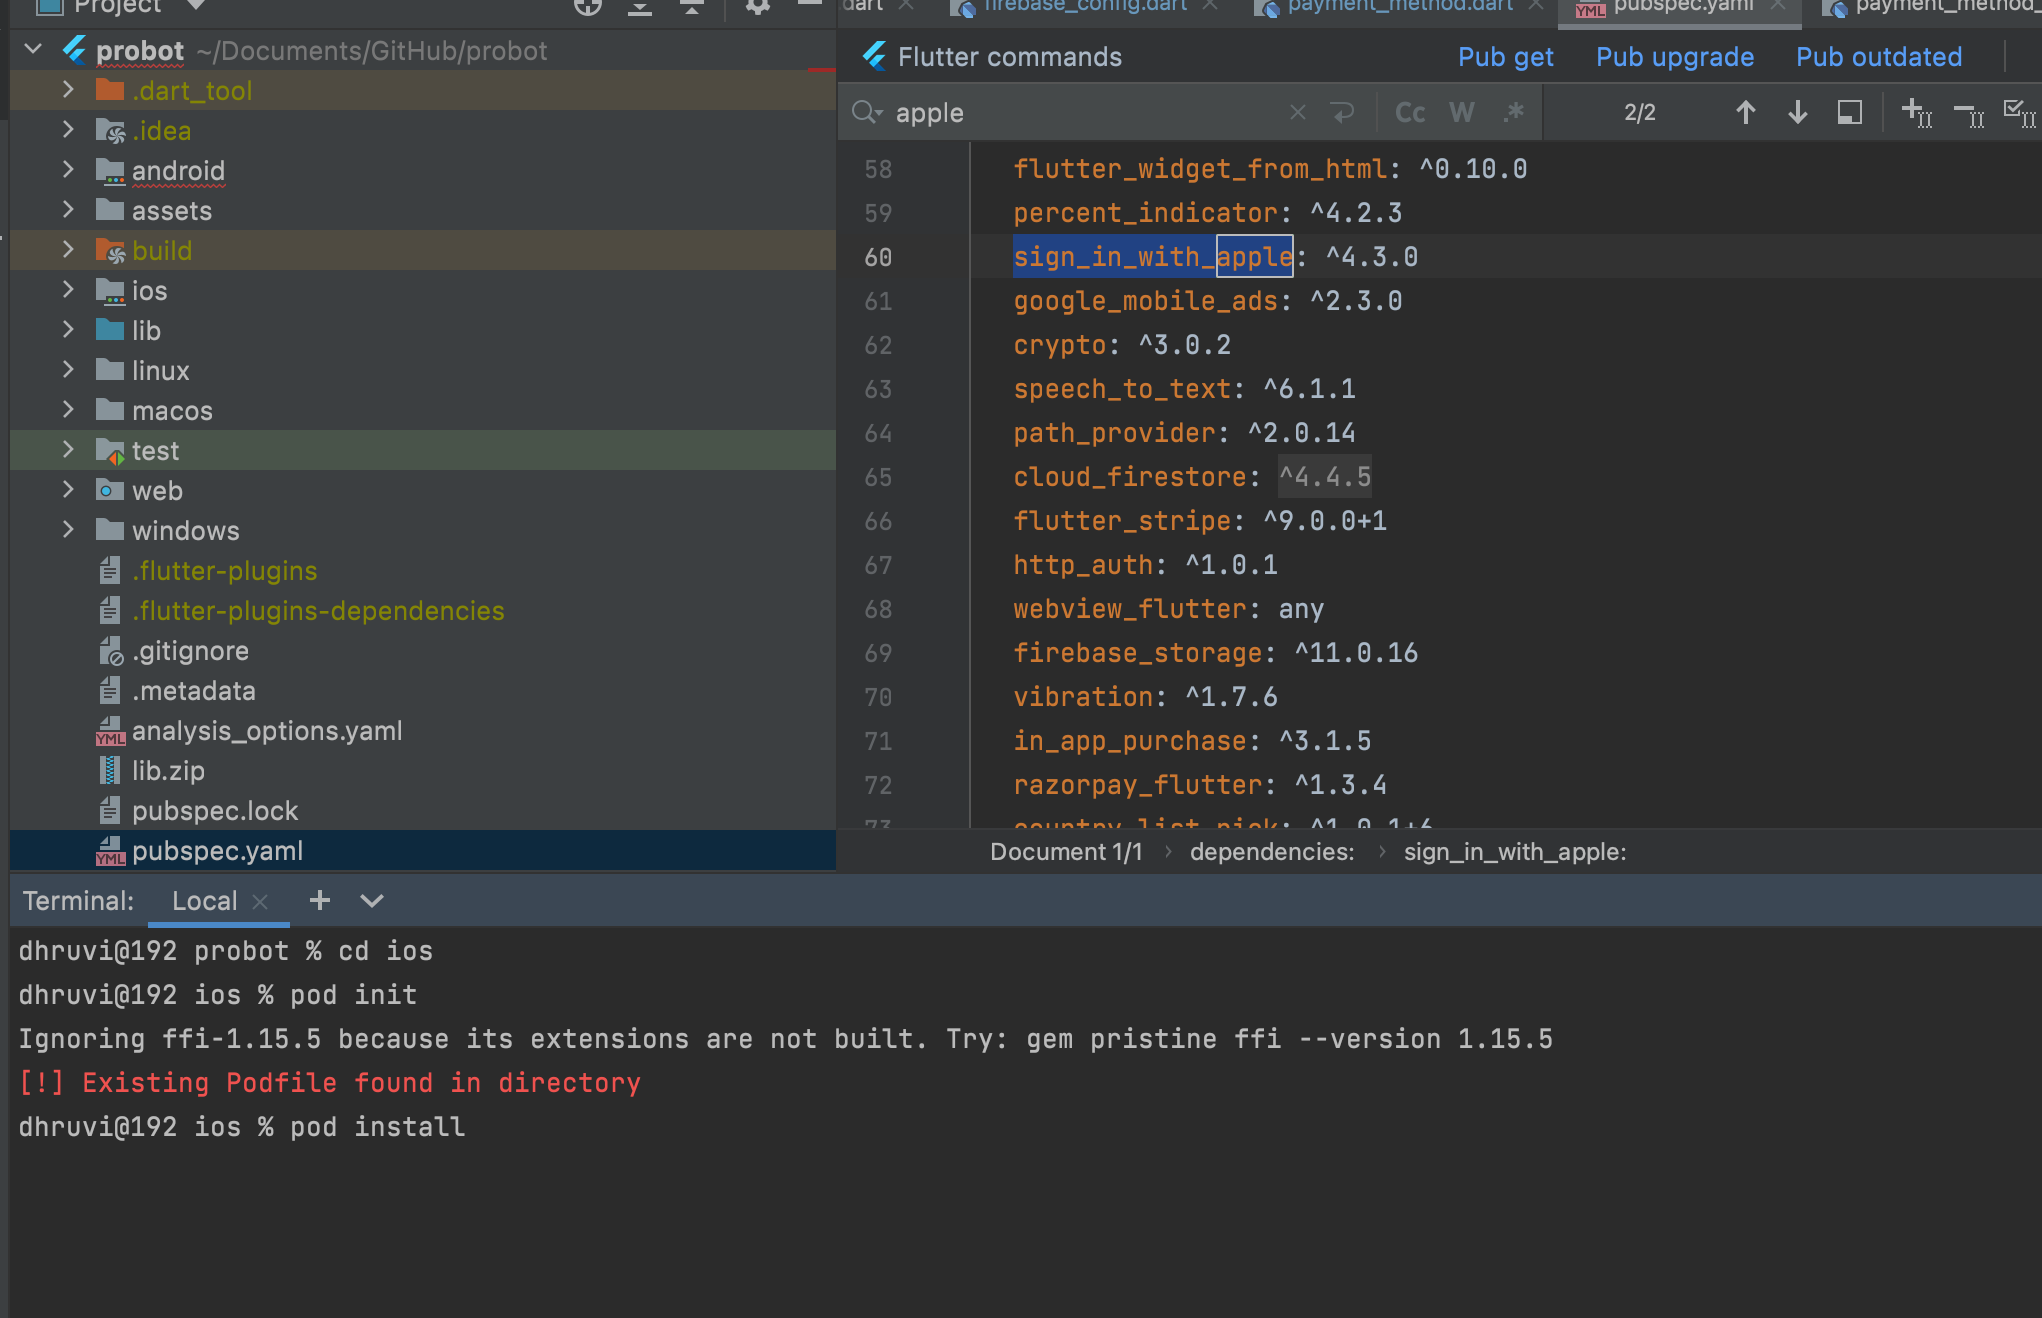
- After complete above steps and after adding SHA key now open sign_in_with_apple plugin link.
- Copy the plugin with latest version and paste it in your project -> pubspec.yaml
- Copy below command, go to project in Android Studio or Visual Studio -> open terminal
and paste command
flutter pub get - Remeber to add all the dependencies in build.gradle which mention in above Firebase Setup
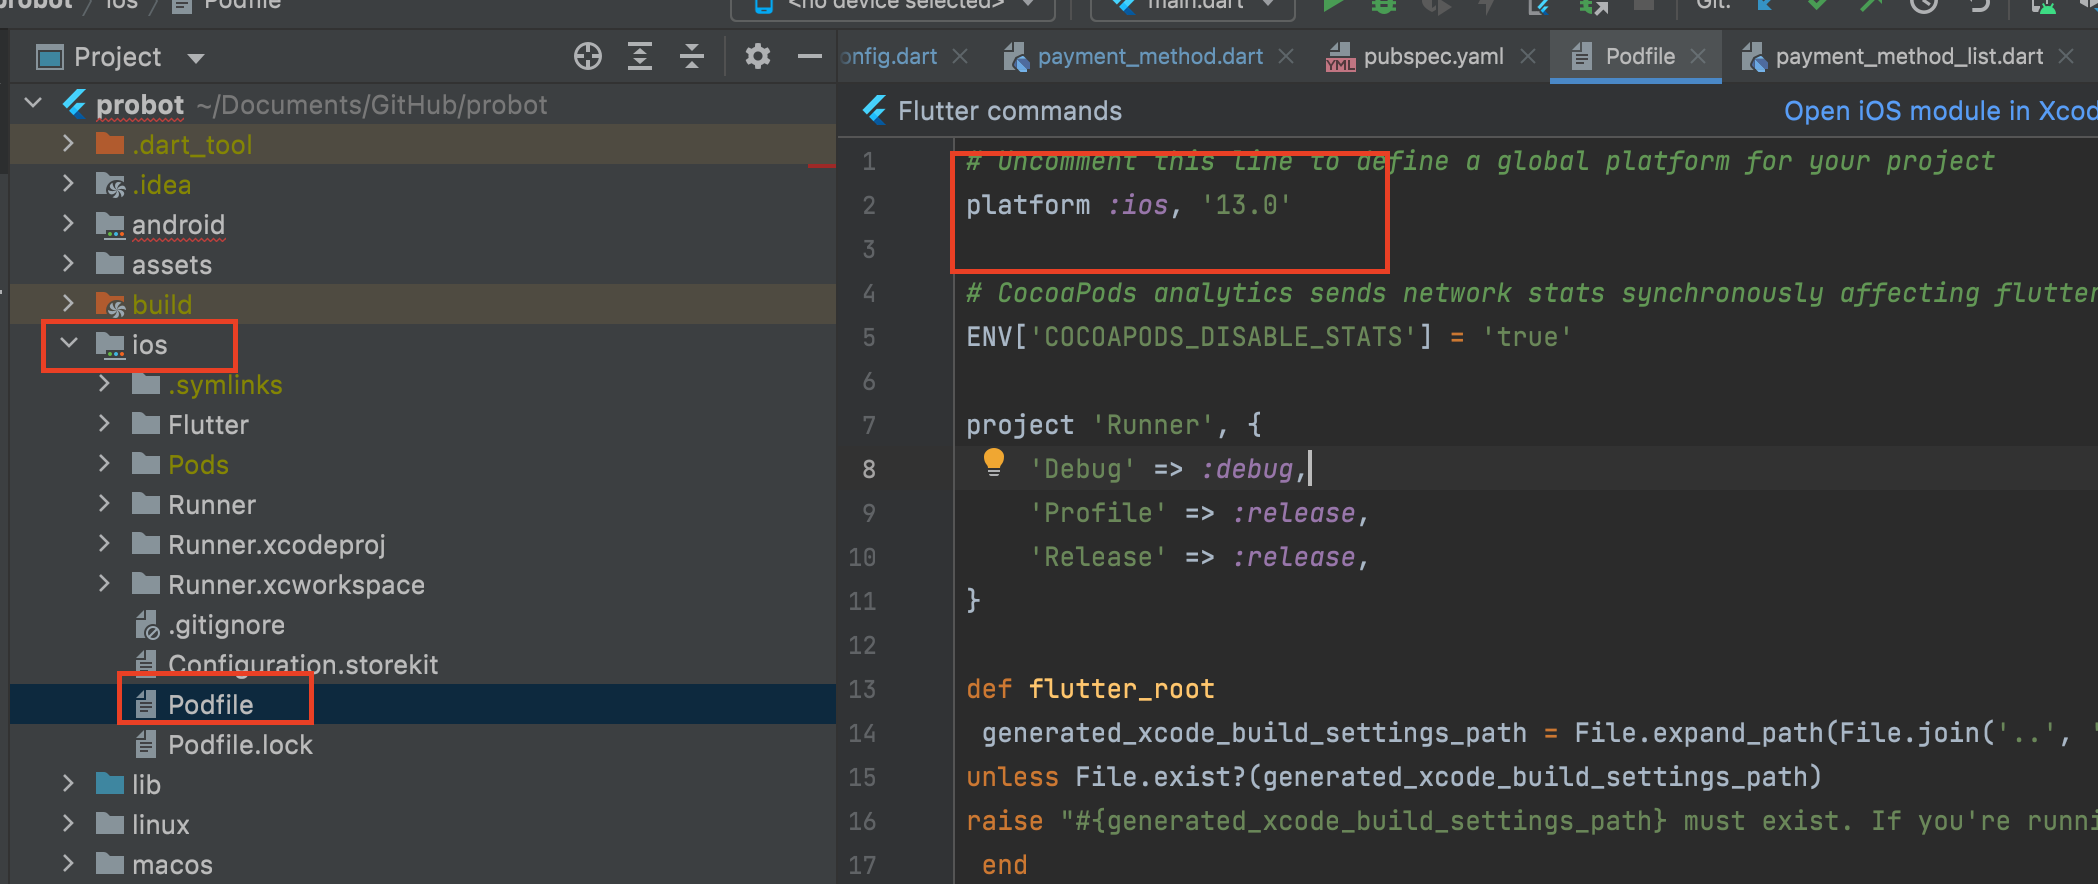
- Now go to your project -> ios -> Podfile and uncomment line platform :ios, '9.0'
and change '9.0' to '13.0'
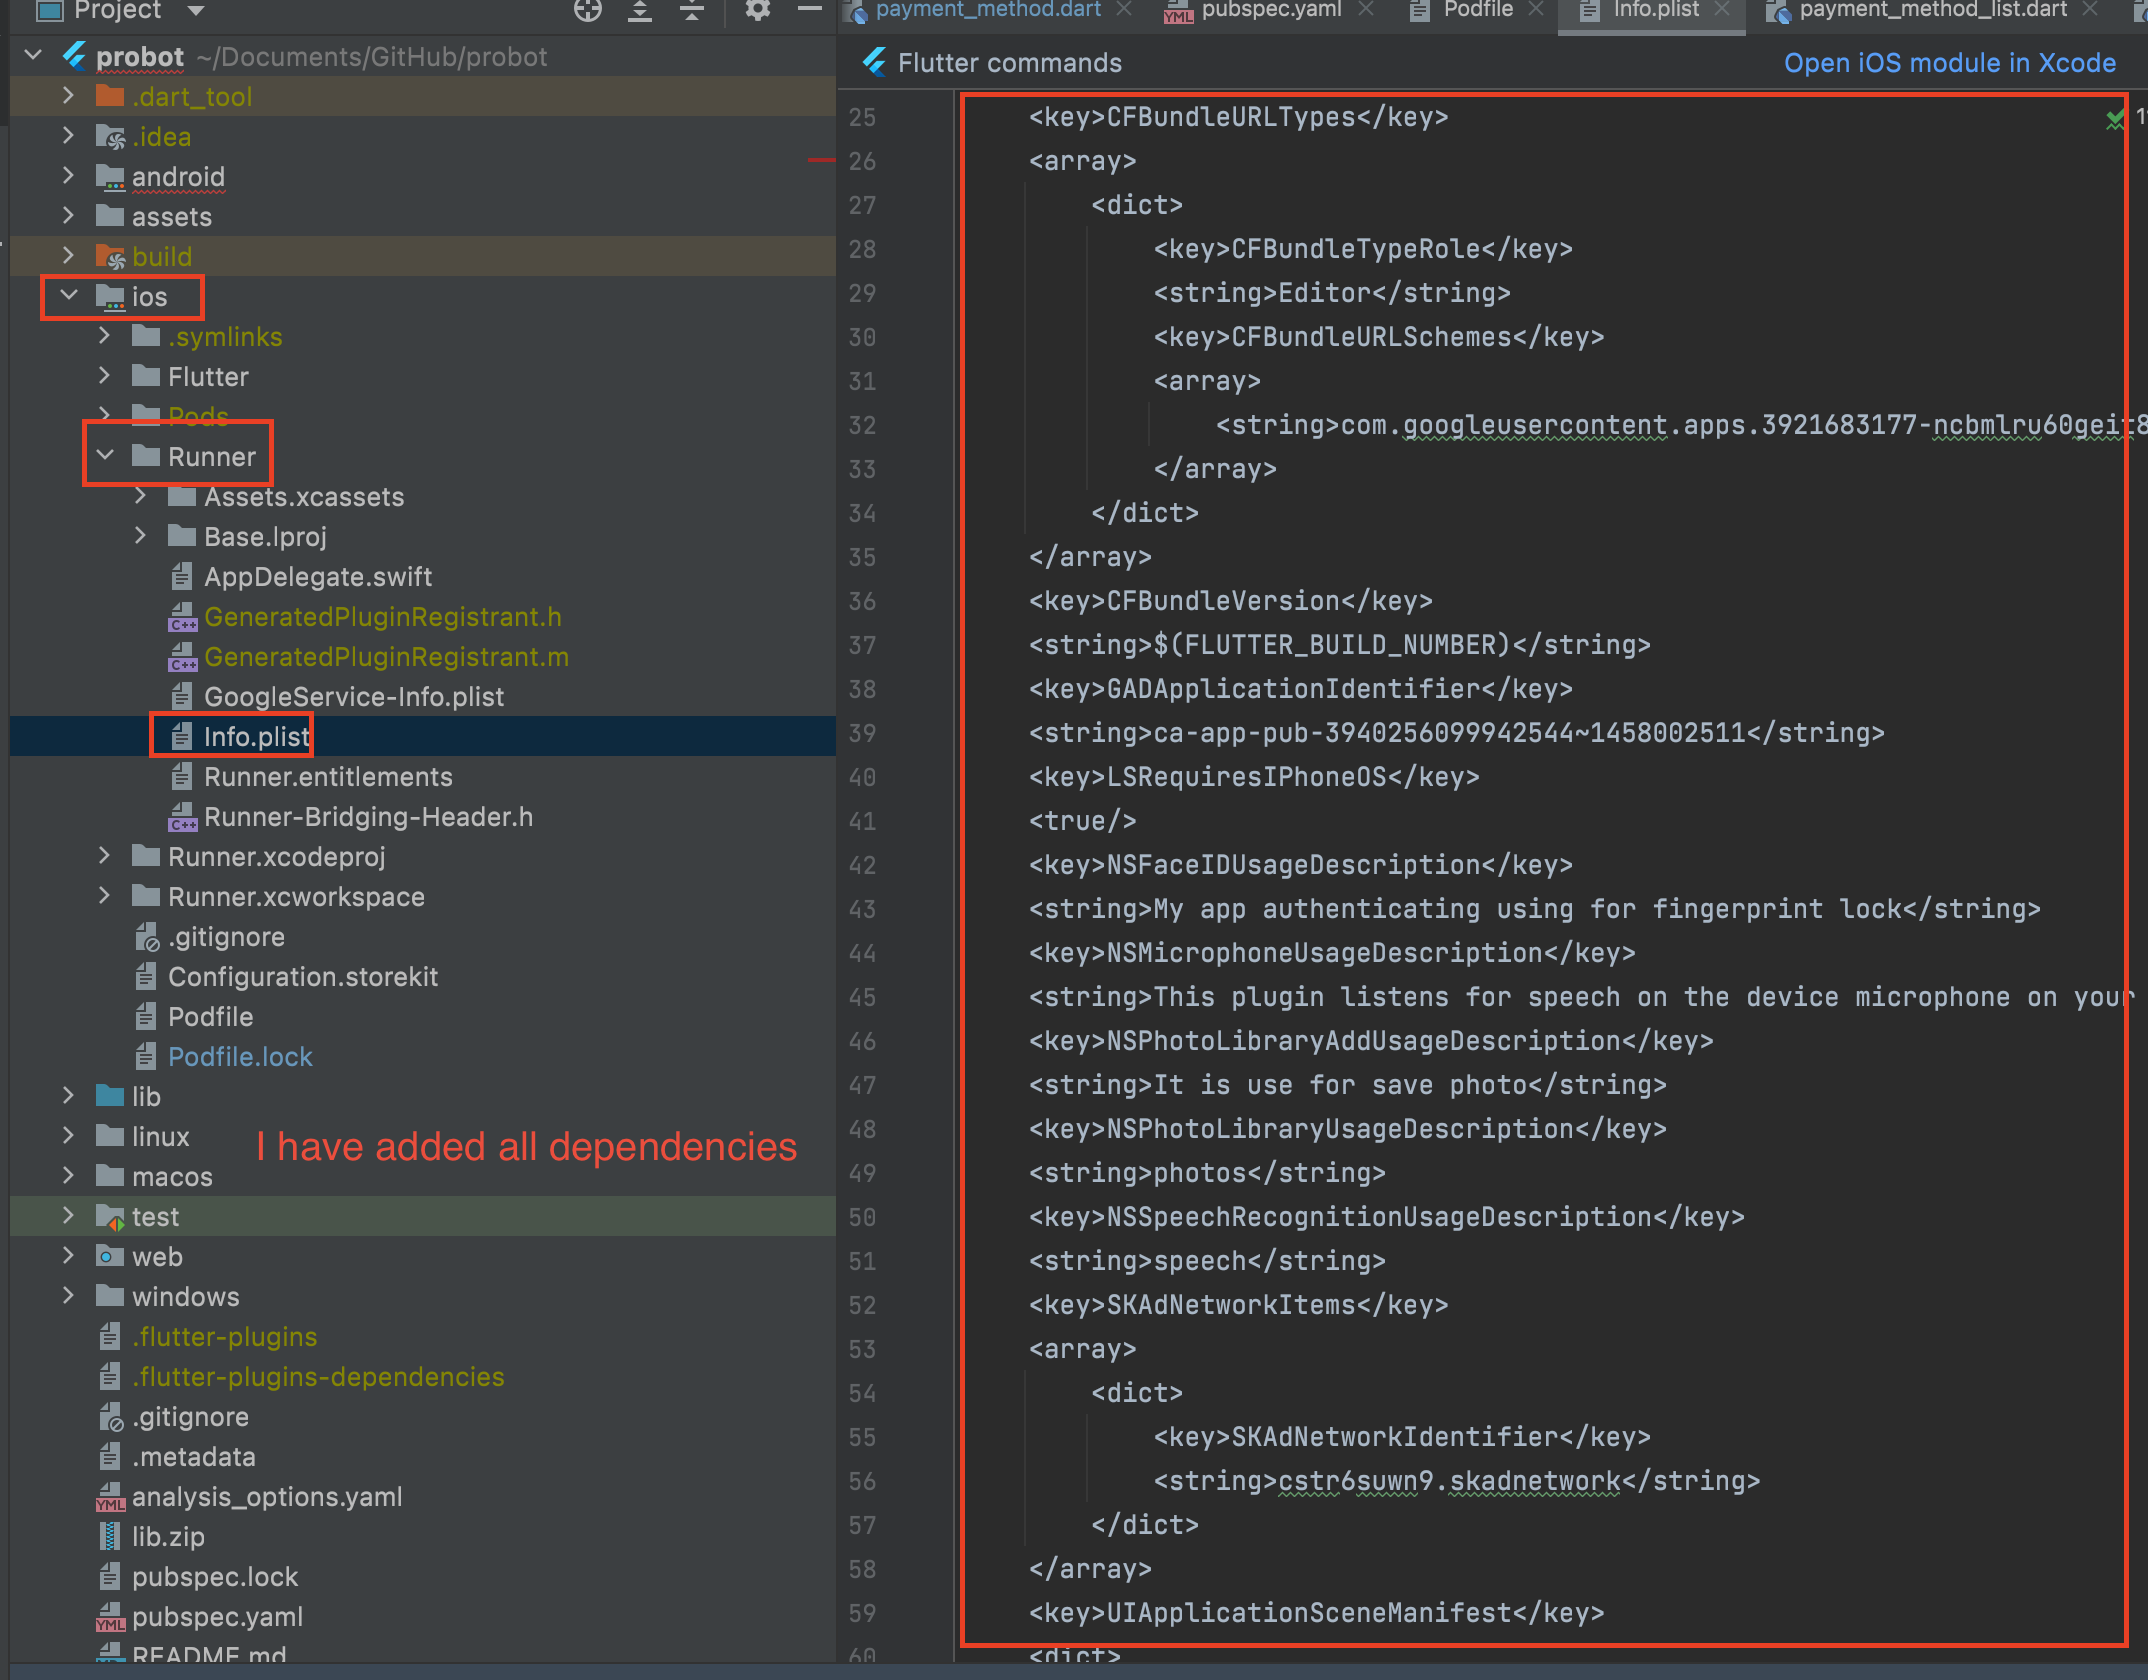
- Before pod init or install add dependencies for ios for all plugins, for that check all
your plugins which is used in pubspec.yaml copy and paste in pub.dev and check whether
any dependencies is there or not if there add according to show in pub.dev
NOTE : We have already update all IOS dependencies in Info.plist
- Copy below command Now open terminal and paste it in terminal remember to check path
before paste command in terminal and Enter it.
cd ios
- Now copy another below command for check pod is there or not.
pod init - If pod is not there it will initalise or there message show Existing Podfile found
in directory
. Now copy another below command and paste it in terminal and enter it
pod install
- Make sure your Xcode version should be latest
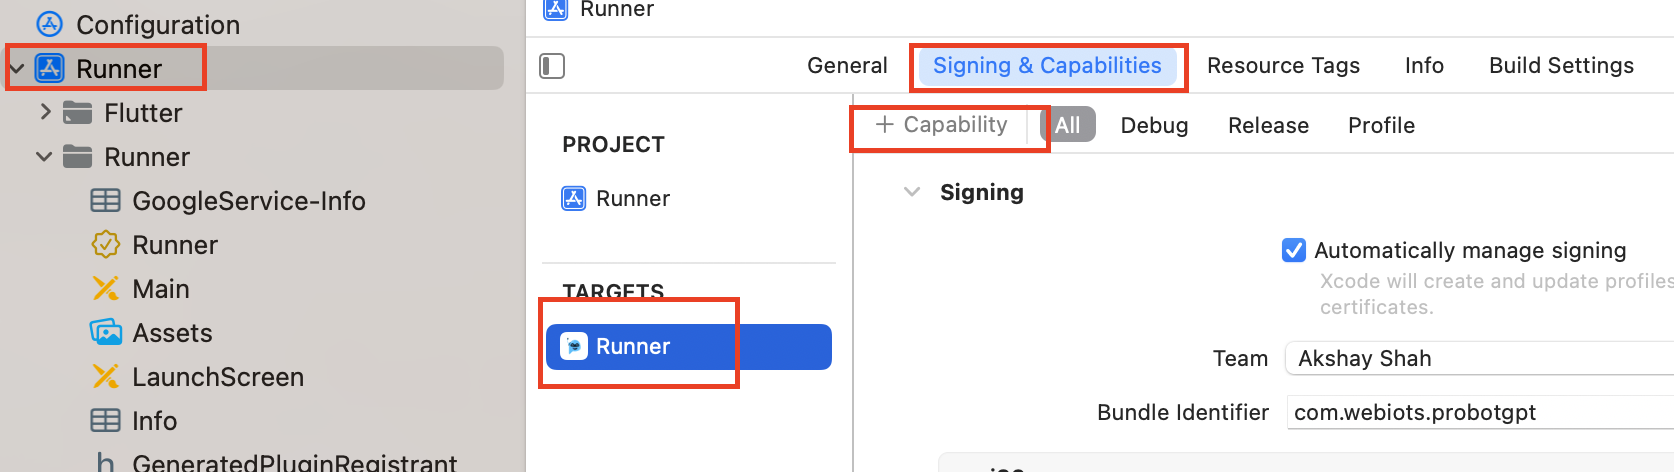
- Open ios/Runner.xcworkspace in Xcode
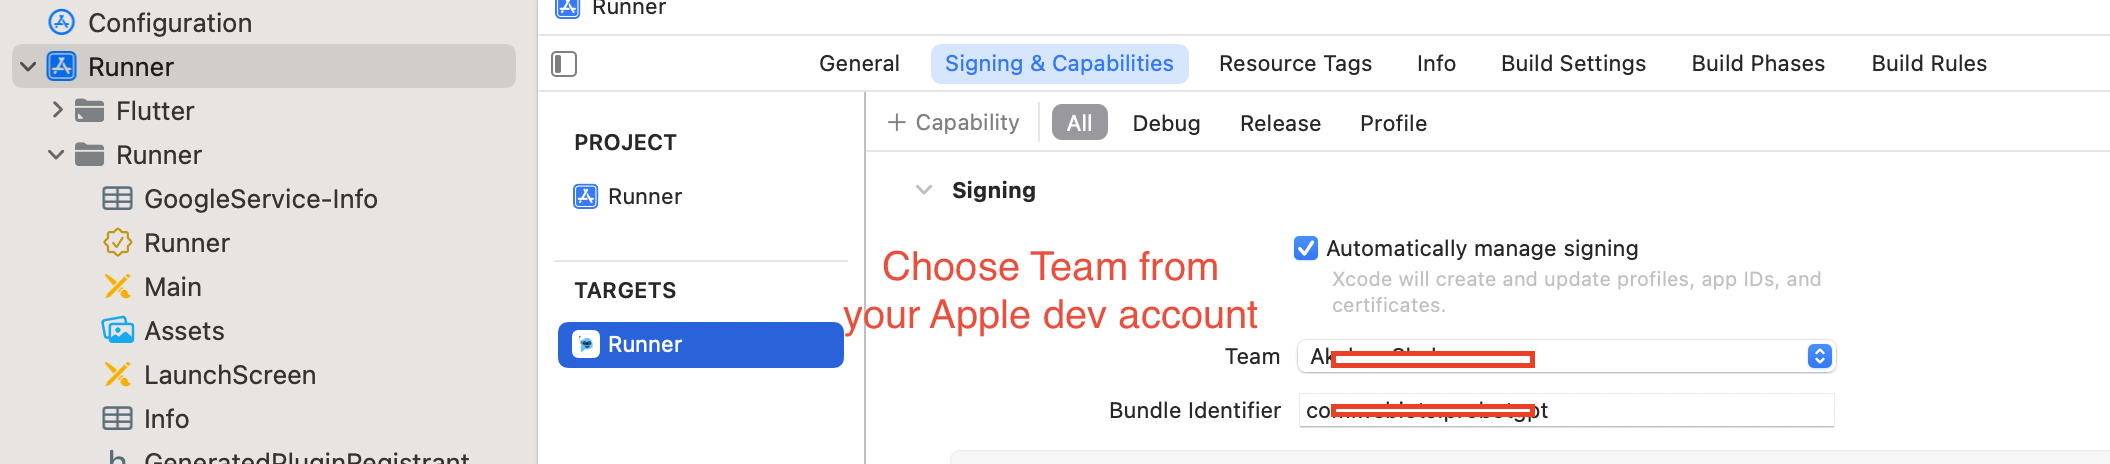
- Under Runner (file browser side bar) -> Targets -> Runner -> Signing & Capabilities set
the "Bundle Identifier" ("App ID") (Example: com.webiots.probotgpt) you have created in
the Apple Developer Portal
earlier
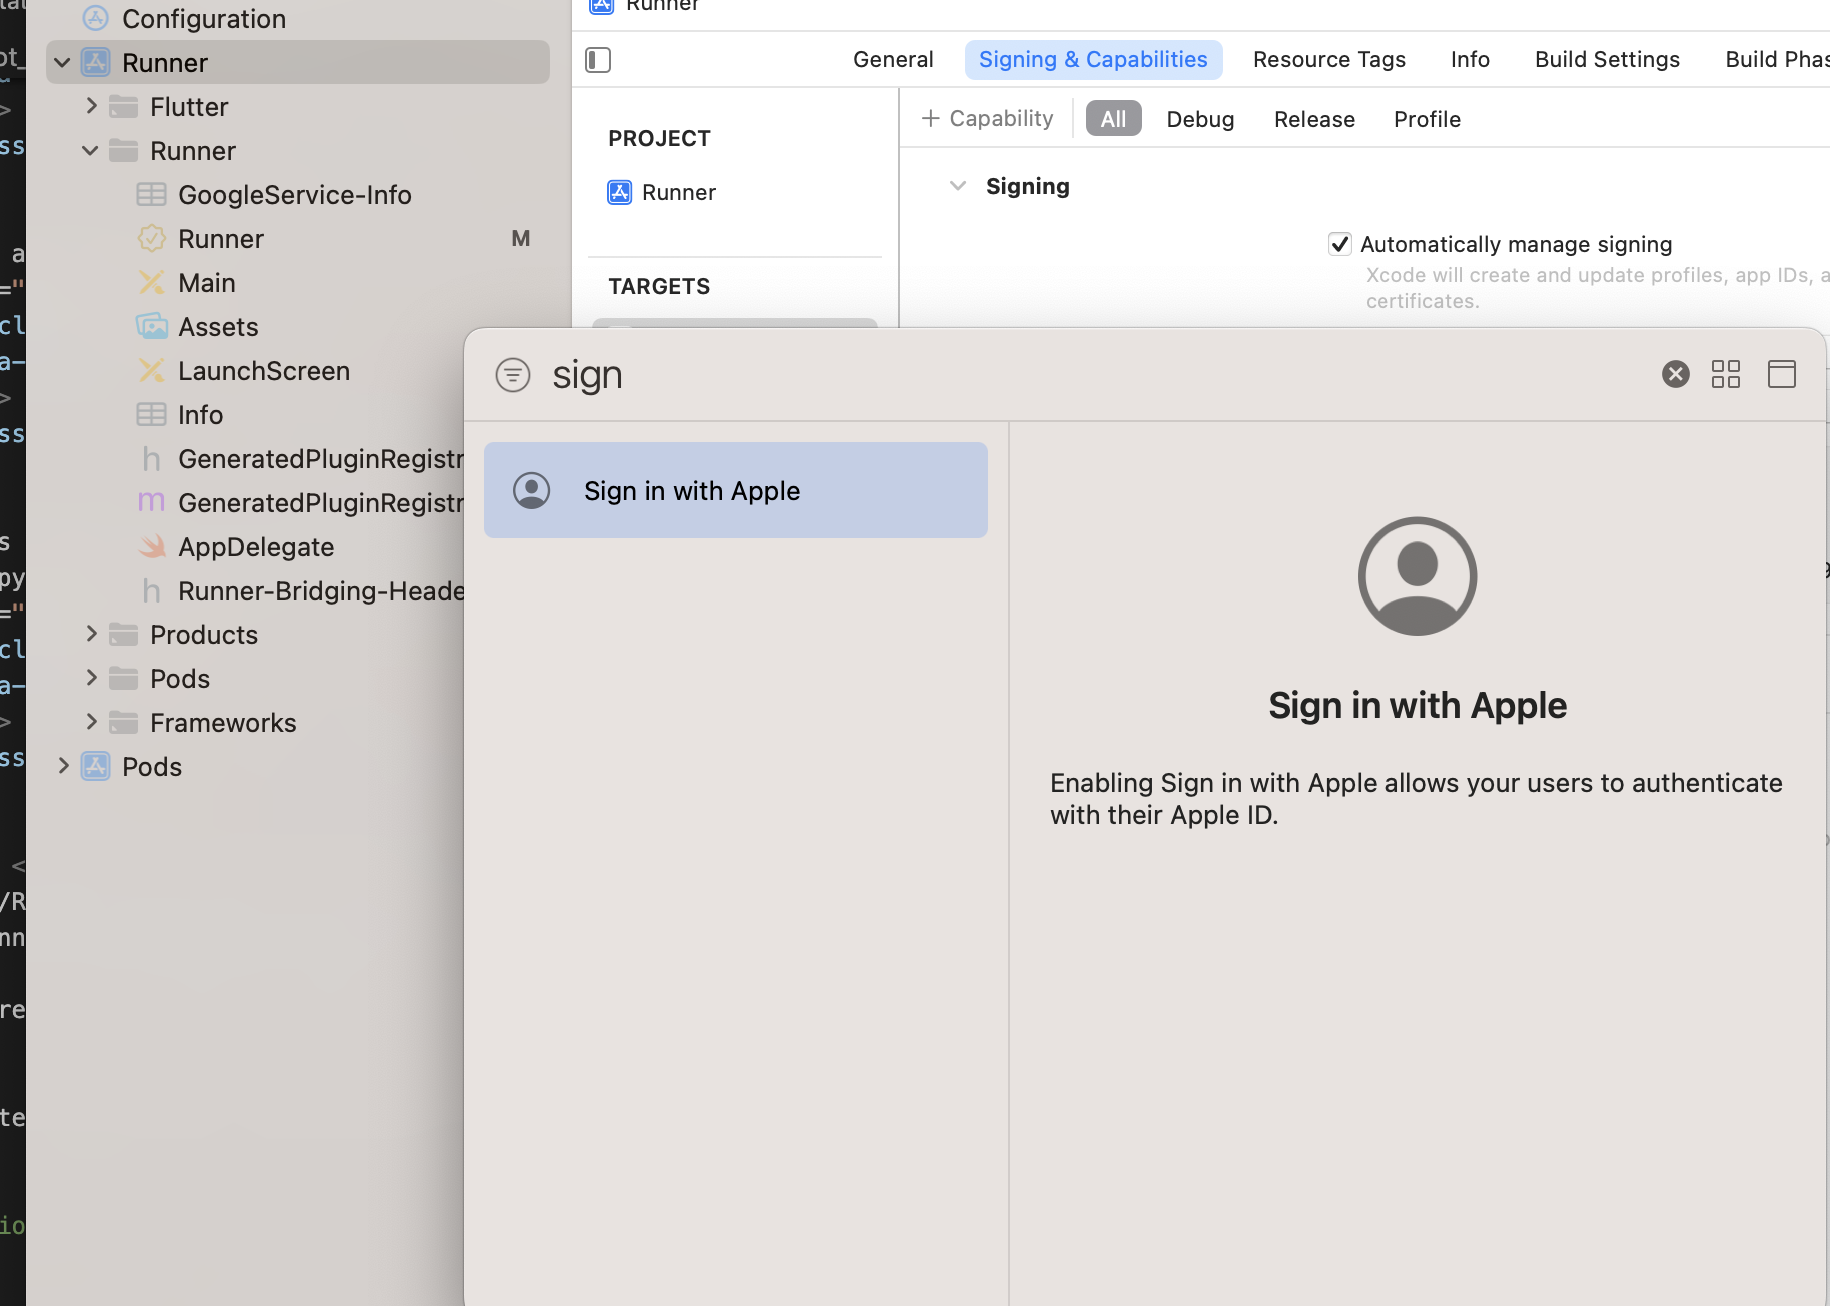
- Ensure that "Sign in with Apple" is listed under the capabilities (if not, add it via the +)
- Now Check apple login real IOS device.