
 Admin Panel
As some of the app data are manage from firebase so we provide admin panel for easy management rather then go to firebase again and again and do changes or for searching
NOTE :
For config collection you have to add data manually in firebase. For config
see the steps in Firebase Rules
- If you want to create new project run the following command to make one:
flutter create
If you want to change in probot admin you can do change and apply your firebase credentials in index.html and in main.dart
Follow below steps for firbase admin setup
Step 1: Setup Firebase
- Login into current Firebase Account.
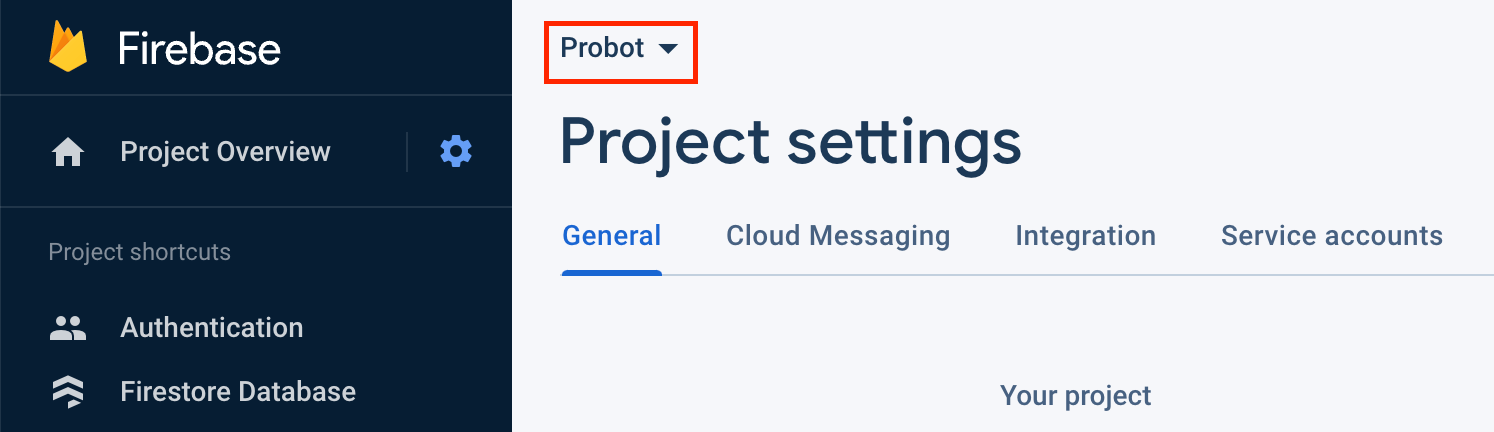
- Select Probot App
-
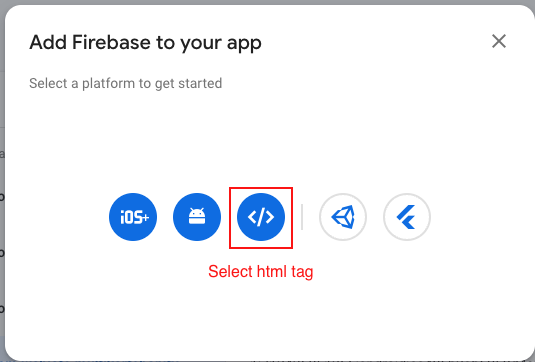
In Project Setting, scroll down and click Add App.

- One pop up will appear, in that select html tag (
< />) option.
- Now enter your app name

- Now check on checkbox for the web hosting and provide hosting name (web name) and click
on Register app button

- Now select Use a
<script> tag and copy code in your admin project inside
web/index.html


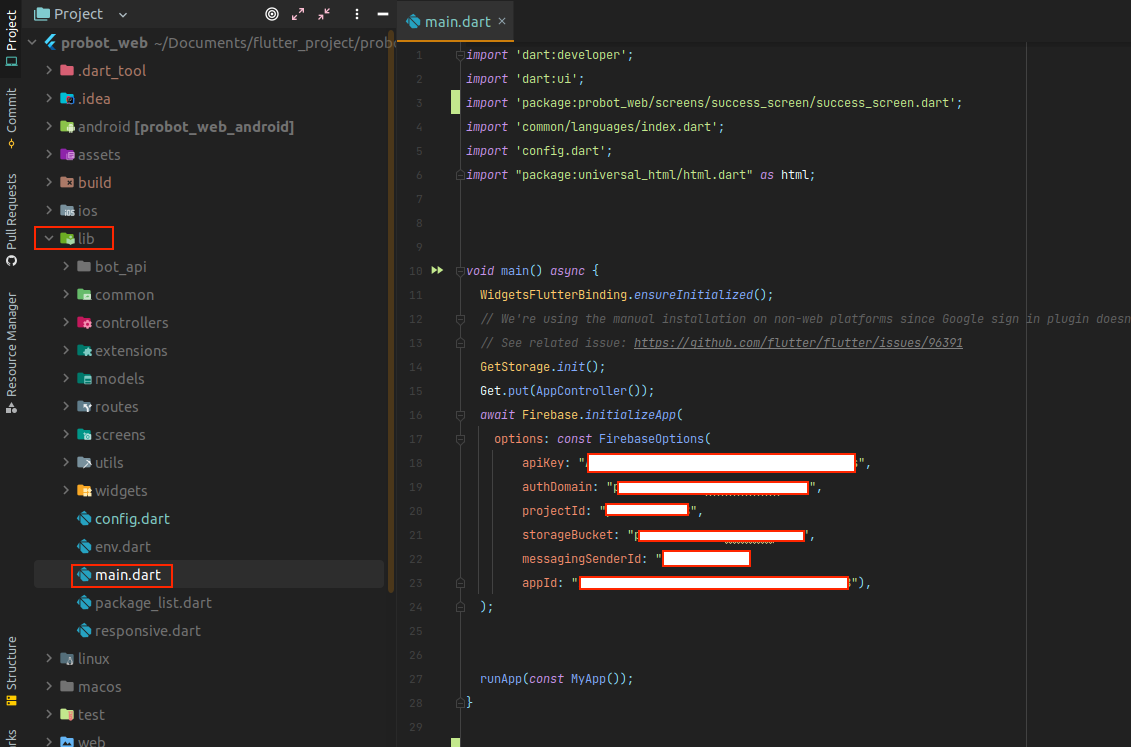
- Now initalize firebase in main.dart
- Add Data according to your requirement.
NOTE :
For access your data in admin panel also upload your image you need to give permission
to Firestore database for data, get update and Storage for Images Upload. For that see
the Firebase Rules
Step 2: Add Admin credentials for Login
- Before using app you need to add Admin credentials for Login.
- Go to firebase console https://console.firebase.google.com/
- Select Project, after that on left handel menu click Firestore Database

- Now click on Start Collection one pop-up will appear give collection name
admin
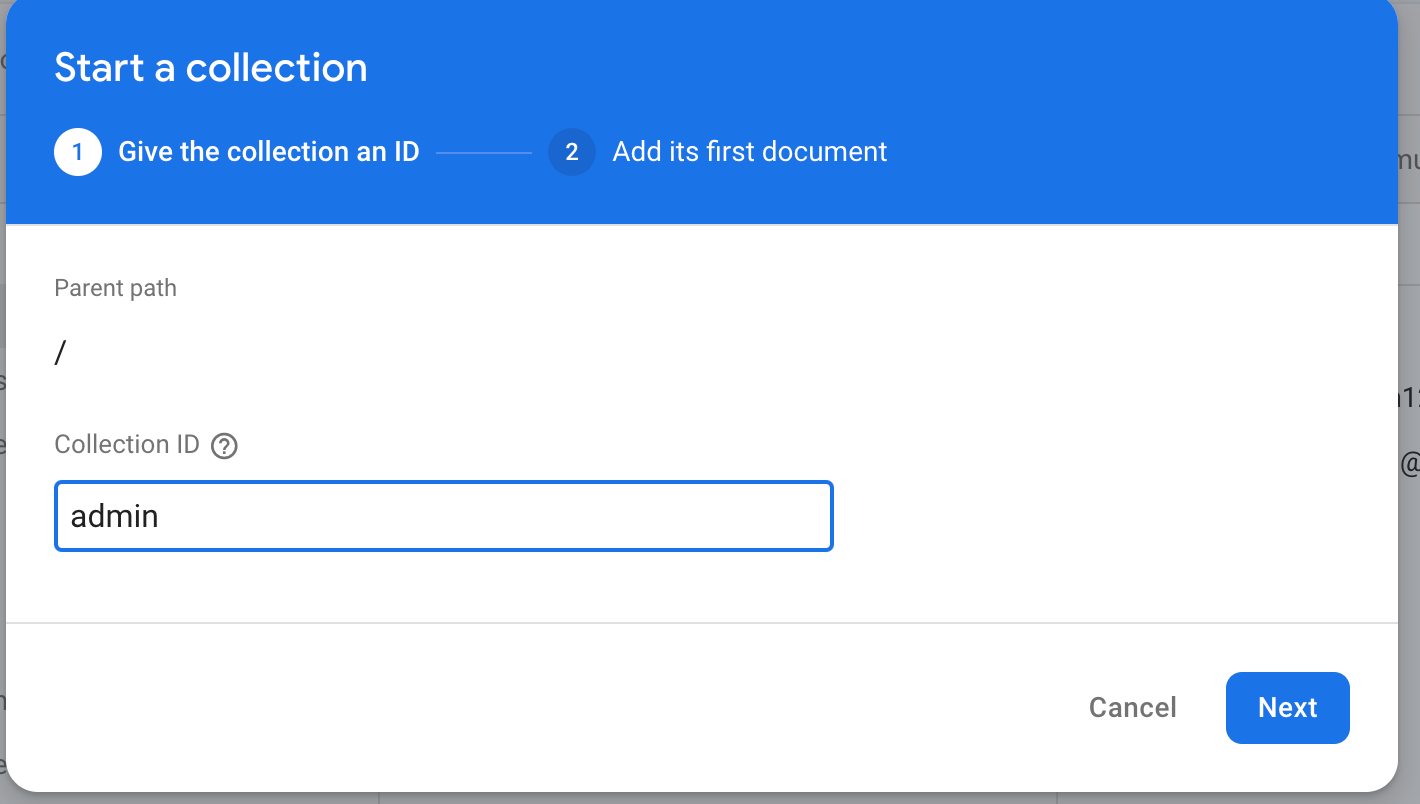
- After that click on Auto-ID

- Add All below field in firebase
No. Fields  -> datatype
1.  userName -> string -> Your email for admin login
2.  password -> string -> Your password for admin login
- You can add multiple admin credentials in this by adding as above fields
For live, users can't do add, update or delete for that credentials in admin panel we have give (admin@gmail,Admim1234) credentials if any user try to access with this credentials they can't access you can remove this condition in your admin panel in login_controller
- Your firestore database look like below

NOTE :
If you want to create a user for testing purposes, add (userName:
admin@gmail,password : Admim1234) credentials in firebase. Follow STEPS 2 for
add credentials
NOTE :
Remember to add all collection in firebase like users, config, characters, etc.. as
per your requirement you can remove the page and controller
Step 3: Install the firebase-tools CLI
- 🏃♀Skip this step if you already have firebase-tools installed.
- If you do not have npm, you must install that first.
-
☝️Note: If you are not sure whether npm is installed on your machine, run $ npm -v , and
see if it lists a version number. If it does, then you already have npm.
- Installing npm on windows.
- Installing npm on linux.
- Installing npm on mac.
- Or download it directly from Node.js.
- Once npm is installed, run the following command to install the firebase-tools:
npm install -g firebase-tools - firebase-tools is now installed!
Step 4: Initialize Firebase hosting for your Flutter project
- Open a terminal and navigate to the root directory for your Flutter app and run this
command
to login:
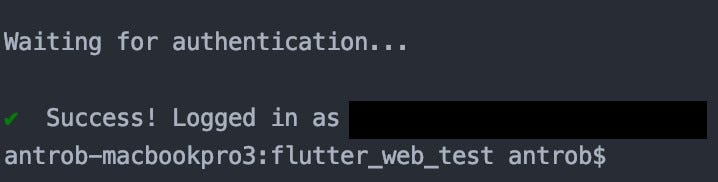
firebase login - ☝️Note: If you are already logged in and want to re-login as different account, first
logout
with:
firebase logout -
Follow the command prompt and the link in your browser. Accept the permissions by
clicking
Ok. When you return to your terminal you should see that you are now logged in:
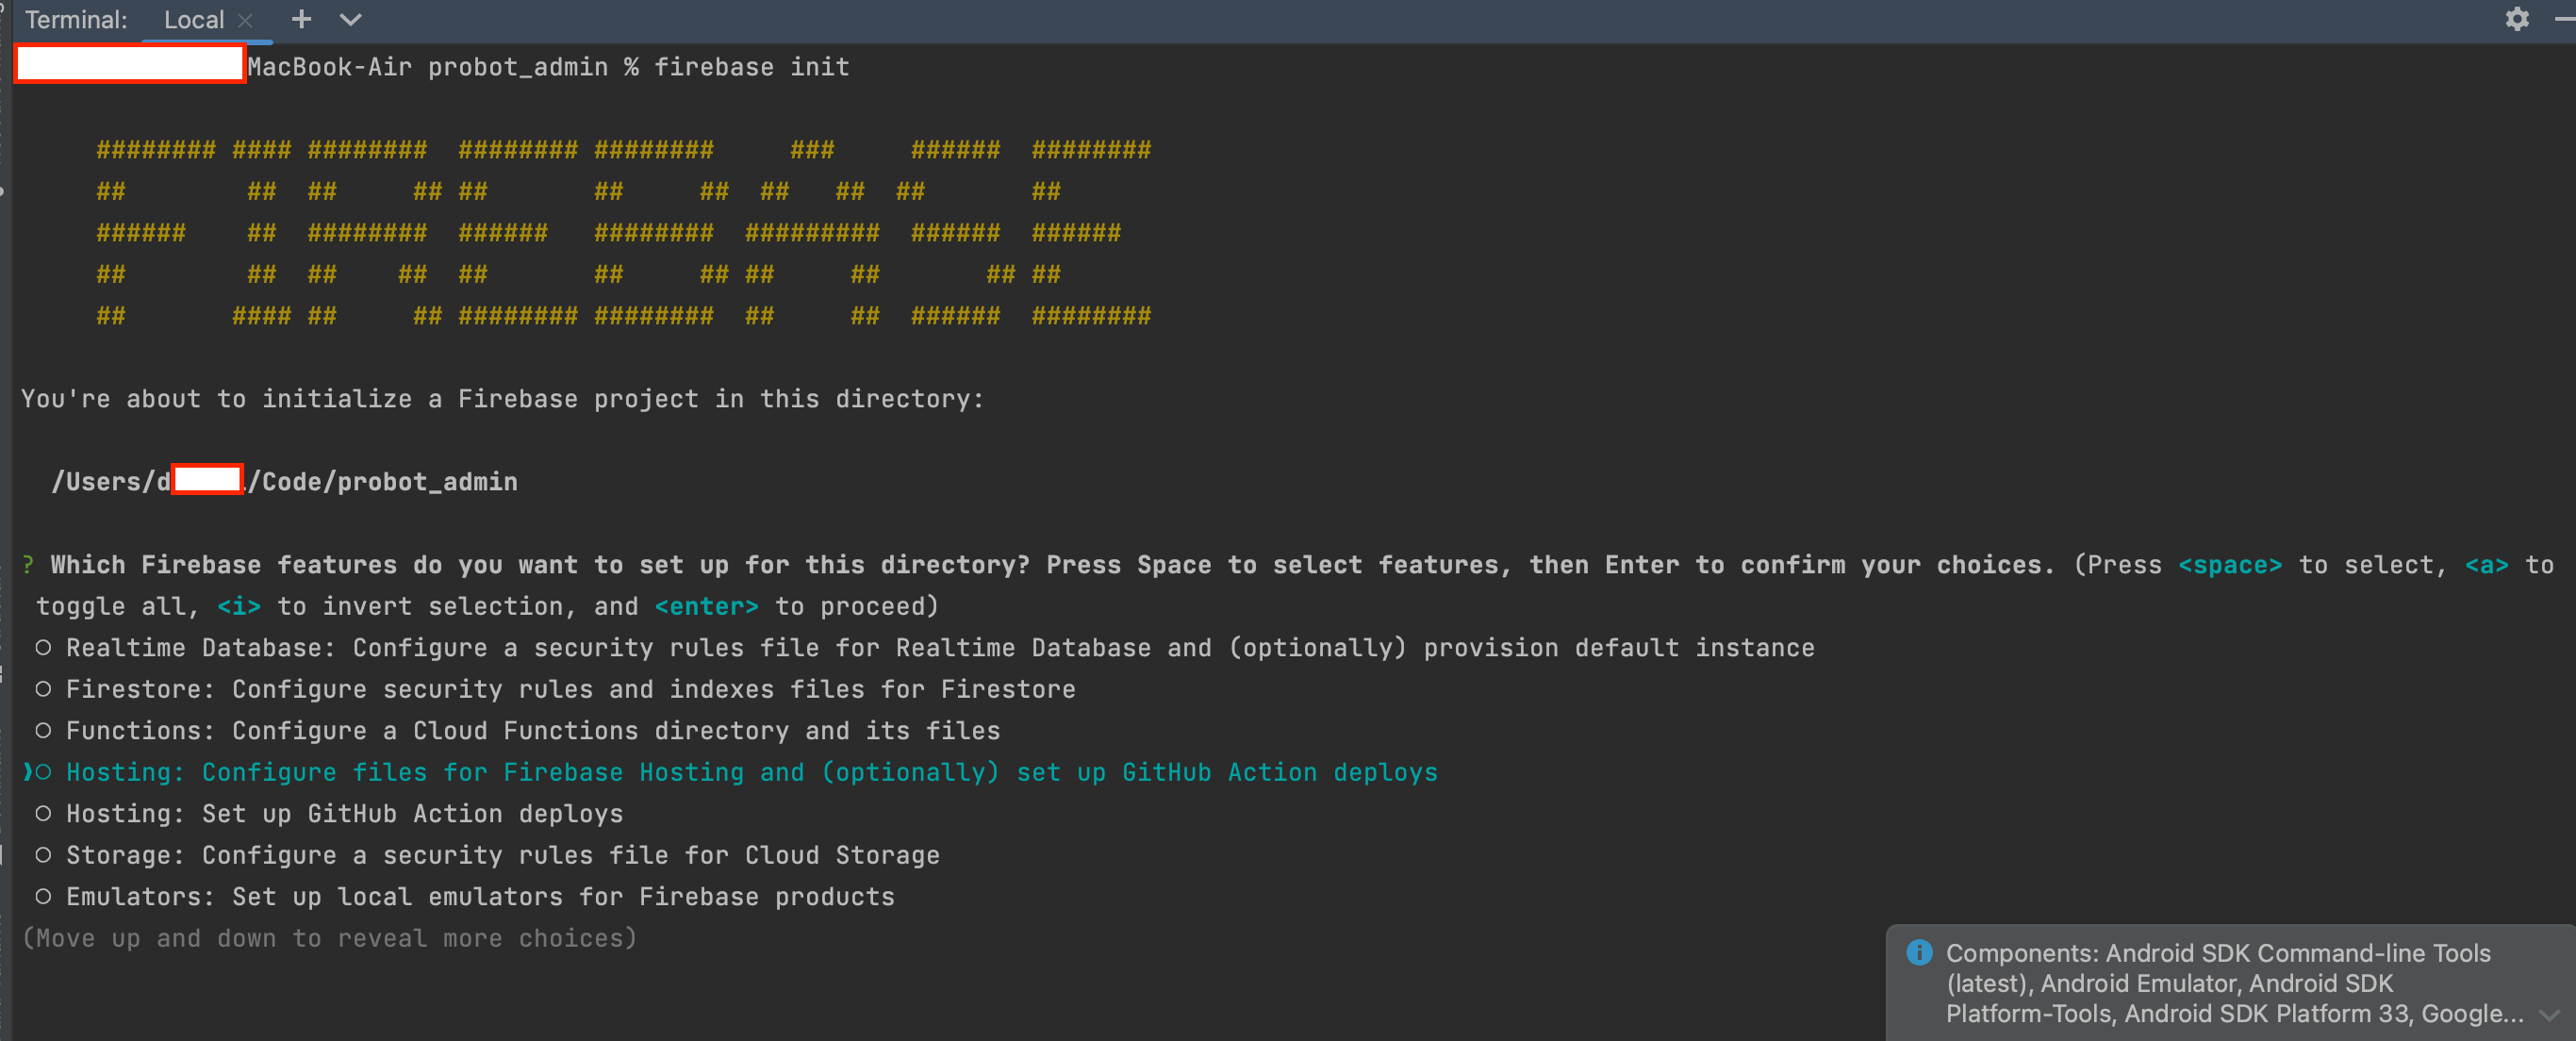
- Next, run this command from the root directory of your Flutter app to initialize your
Firebase project:
firebase init - Use the arrow keys to navigate the cursor to Hosting and hit the spacebar to select it,
then
press enter. Now you will see this screen:
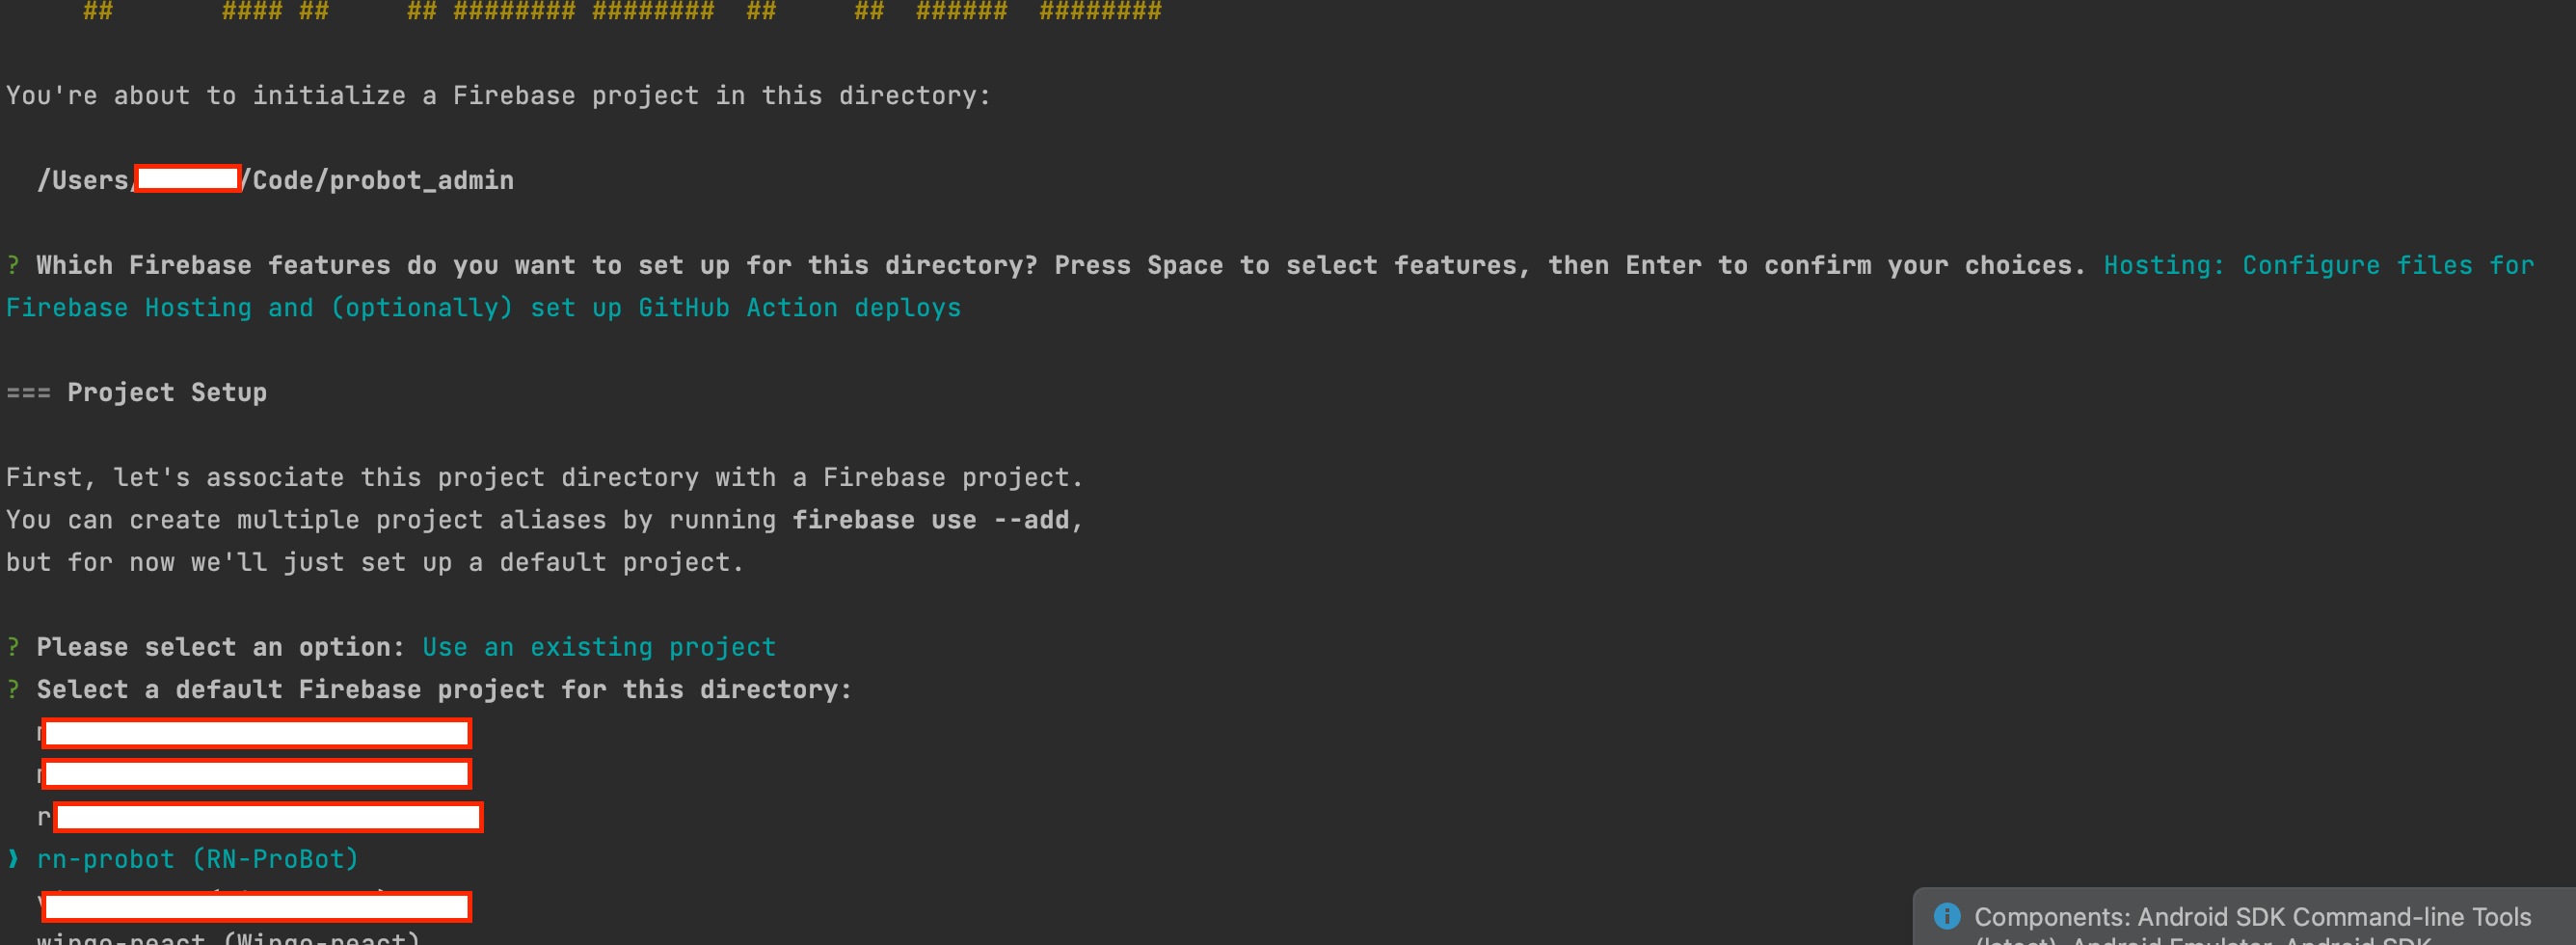
- Select Use an existing project by pressing Enter. Use the arrow keys to select
the
project
you made in step 1.
- Build your app for web:
flutter build web - Next, write build/web as the public directory and press enter, then enter n (for no) to select the single page app option
- Next, write y (for yes) to Configure as a single-page app (rewrite all urls to /index.html)? option
- Next, write n (for no) to deploy with Github option
- Next, write y (for yes) to overwrite 404.html option, If this option show
- Next, write y (for yes) to
overwrite index.html option

- ☝️Note: After this step, 2 new files are created (.firebaserc and firebase.json) in your root directory. Check and make sure they are there. If not, check for errors in the firebase init step and retry.
- Again Build your app for web:
flutter build web - This builds the necessary files in
/build/web. - Finally, run:
firebase deploy - The hosting files are uploaded and hosted at your Firebase URL. You can follow the link in your terminal to your Flutter web project!