Loader
Sometimes content on the page take time to load, because of which the user might see the content with improper design. To avoid that we could show the loader untill the content is loaded properly.
Below is our code for showing loader for 3 seconds on intial page load. This code is in the file app.vue, you can find this file on this path: src>app>shared>components>loader folder
// loaders.html //
<!-- Loader starts-->
<div class="loader-wrapper" [class.loderhide]="!show">
    <div class="theme-loader">
        <div class="loader-p"></div>
    </div>
</div>
  <!-- Loader Ends-->
// loaders.ts //
import { Component} from '@angular/core';

@Component({
    selector: 'app-loader',
    templateUrl: './loader.html',
    styleUrls: ['./loader.scss'],
    imports:[],
})
export class Loader{

  public show: boolean = true;

  constructor() {
    setTimeout(() => {
      this.show = false;
    }, 3000);
  }

}
We have added the loader div and given the animation in its scss file
Toggle Loader
To show and hide the loader we toggle loaderhide class
through show variable. Style for the
loaderhide class has been define below, it toggles display
of the div between none and visible. Initially we have kept show to
true, but when the component is mounted we run a function which call the
settimeout function. settimeout functions overwrites the value of show
variable to false after 3 second.
If you want to make changes in the animation or the design of the
loader, you can navigate to
public>>assets>>scss>>theme>>_loader.scss Here default
styles and animation has been given, make changes as per your needs.
You can modify the timing of the loader by changing the time in setTimeout function. Instead of 3000ms you can set any time as per your needs.
Routing
One of the most important things while creating an Angular project is creating routes. Without routes you cannot render any page in the browser.
In this page we will learn how to create routes for our pages.
When creating angular project make sure that you select routing to setup router by default.
Defining routes
app.config.ts file will be created automatically, here we can
define our paths for each routes.
But when we are working on a large projects, such as Viho, number of paths will grow very fast, so we create a separate file routes.ts in routes folder to keep our routes more organized.
import { Routes } from '@angular/router';

export const content: Routes = [
  {
    path: 'dashboard',
    loadChildren: () => import('../../components/dashboard/dashboard.routes')
  },
  {
    path: 'widgest',
    loadChildren: () => import('../../components/widgets/widgets.routes')
  }
]
We give the path for our routes, and in loadChildren function we provide our routes .
And then we will import this routes.ts file in our
app.config.ts file.
import { Routes } from '@angular/router';
import { Login } from './auth/login/login';
import { Content } from './shared/layout/content/content';
import { content } from './shared/routes/routers';

export const routes: Routes = [
  {
    path: '',
    redirectTo: 'dashboard/default',
    pathMatch: 'full',
  },
  {
    path: 'auth/login',
    component: Login,
  },
  {
    path: '',
    component: Content,
    children: content,
  },
  {
    path: '**',
    redirectTo: '',
  },
];
Now We are done setting our modules path, but when we create a component
inside a Module then path for those components are written in
route_name.routes.ts file. Please refer to Our
Create New Page Guide to see how paths for the components are
given.
Customize or Replace Menu Sidebar
There are Numerous links in sidebar and if we write whole code in html then number of lines will increase by a lot. So to prevent that we have created a service file for the sidebar links so that we can loop through the array links that we have made in this service file and render our links accordingly.
You can find nav.service.ts on the following path:
src>app>shared>service>nav.service.ts
Making changes in sidebar.
If you require to make any changes in the sidebar, you could follow the given instructions.
To add links in sidebar:
If you need to add or remove links in the sidebar, all you need to do is make changes in the nav.service.ts file.
For Example:
Lets say we want to change the previous sidebar to the new sidebar.
To achieve this we can add new object in nav.service.ts, where we want to add the new link. Here we want to add new link in between Dashboard and widget links so we will make the following changes.
{
	title: 'Dashboards', icon: 'home', type: 'sub', badgeType: 'success', badgeValue: '2', active: true,
	 children: [
		{
			path: '/dashboard/default',
			title: 'Default',
			type: 'link'
		},
		{
			path: '/dashboard/ecommerce',
			title: 'Ecommerce',
			type: 'link'
		}
	]
},
{
	title: 'New Link', icon: 'git-pull-request', type: 'sub', active: false,
	children: [
		{
			path:'/newLink/subLink1',
			title:'New Sub Link 1',
			type: 'link'
		},
		{
			path:'/newLink/subLink1',
			title:'New Sub Link2',
			type: 'link'
		}
	]
},
{
	title: 'Widgets', icon: 'airplay', type: 'sub', active: false,
	 children: [
		{ path: '/widgets/general', title: 'General', type: 'link' },
		{ path: '/widgets/chart', title: 'Chart', type: 'link' }
	]
},
As you can see above, you will need add data in the predefined format. Title key will contain the text you need to display for the link. In the path key, you will need to add the path that you define in the router.
You can add icons before the link in ui by giving feather icon name in icon key. Here is the link for the feather icon you might want to you. https://feathericons.com/. Copy the name of the icon you want to show and paste it in before icon key.
If the link contains sub links add type : 'sub', and if there are no sub links , just add type: 'link'
For Example: If you want to add a link without any sublinks then add the following code.
{
    path: '/file-manager',
    title: 'File Manager',
    icon: 'git-pull-request',
    type: 'link'
},
Note:Make sure that the path you enter in the json is same as the one that you have given in the router, or else error will be thrown as same path will not be found.
If you want to remove links from the sidebar:
As we added code in the above section to add new links in the sidebar. You simply need to remove the whole object to make it disappear from the sidebar.
For Example: We added the following code in the menu,json file. If we want to remove the same then we will remove the object in the array of links in nav.service.ts.
{
    title: 'New Link', icon: 'git-pull-request', type: 'sub', active: false,
    children: [
        {
            path:'/newLink/subLink1',
            title:'New Sub Link 1',
            type: 'link'
        },
        {
            path:'/newLink/subLink1',
            title:'New Sub Link2',
            type: 'link'
        }
    ]
},
Style customization
Suppose you want to customize color and font as per your project then you can change it by:
Theme Color
-
Now we are come with unlimited color option so suppose you want to
customize your theme primary and secondary color then just select color
from customizer see in right side select color as per your choice and then
click on apply button, it will refresh your page and now you will get
color as per your choice, now if you want to add this color parmenently in
your project
- just copy configuration from top button and paste that in /src/data/customizer/config.jsx
- just copy your color code from above config and update in /src/assets/scss/style.scss
Variable customization of complete theme
Suppose you want to change color and size of card-body, Alert, Badge, Form input, breadcrumb,buttons, footer, sidebar and many more then you just need to change that particular color from _variable.scss in assets >> scss >> theme >> _variable.scss
Google Font
You can change font of your theme from index.html in public folder
<link href="https://fonts.googleapis.com/css?family=Rubik:400,400i,500,500i,700,700i&display=swap" rel="stylesheet">
<link href="https://fonts.googleapis.com/css?family=Roboto:300,300i,400,400i,500,500i,700,700i,900&display=swap">
Theme Customize
Layouts
We have provided a bunch of page layouts and menu layouts that can be implemented with just a options change to body!
For creating your dream layout open customizer by click on setting icon
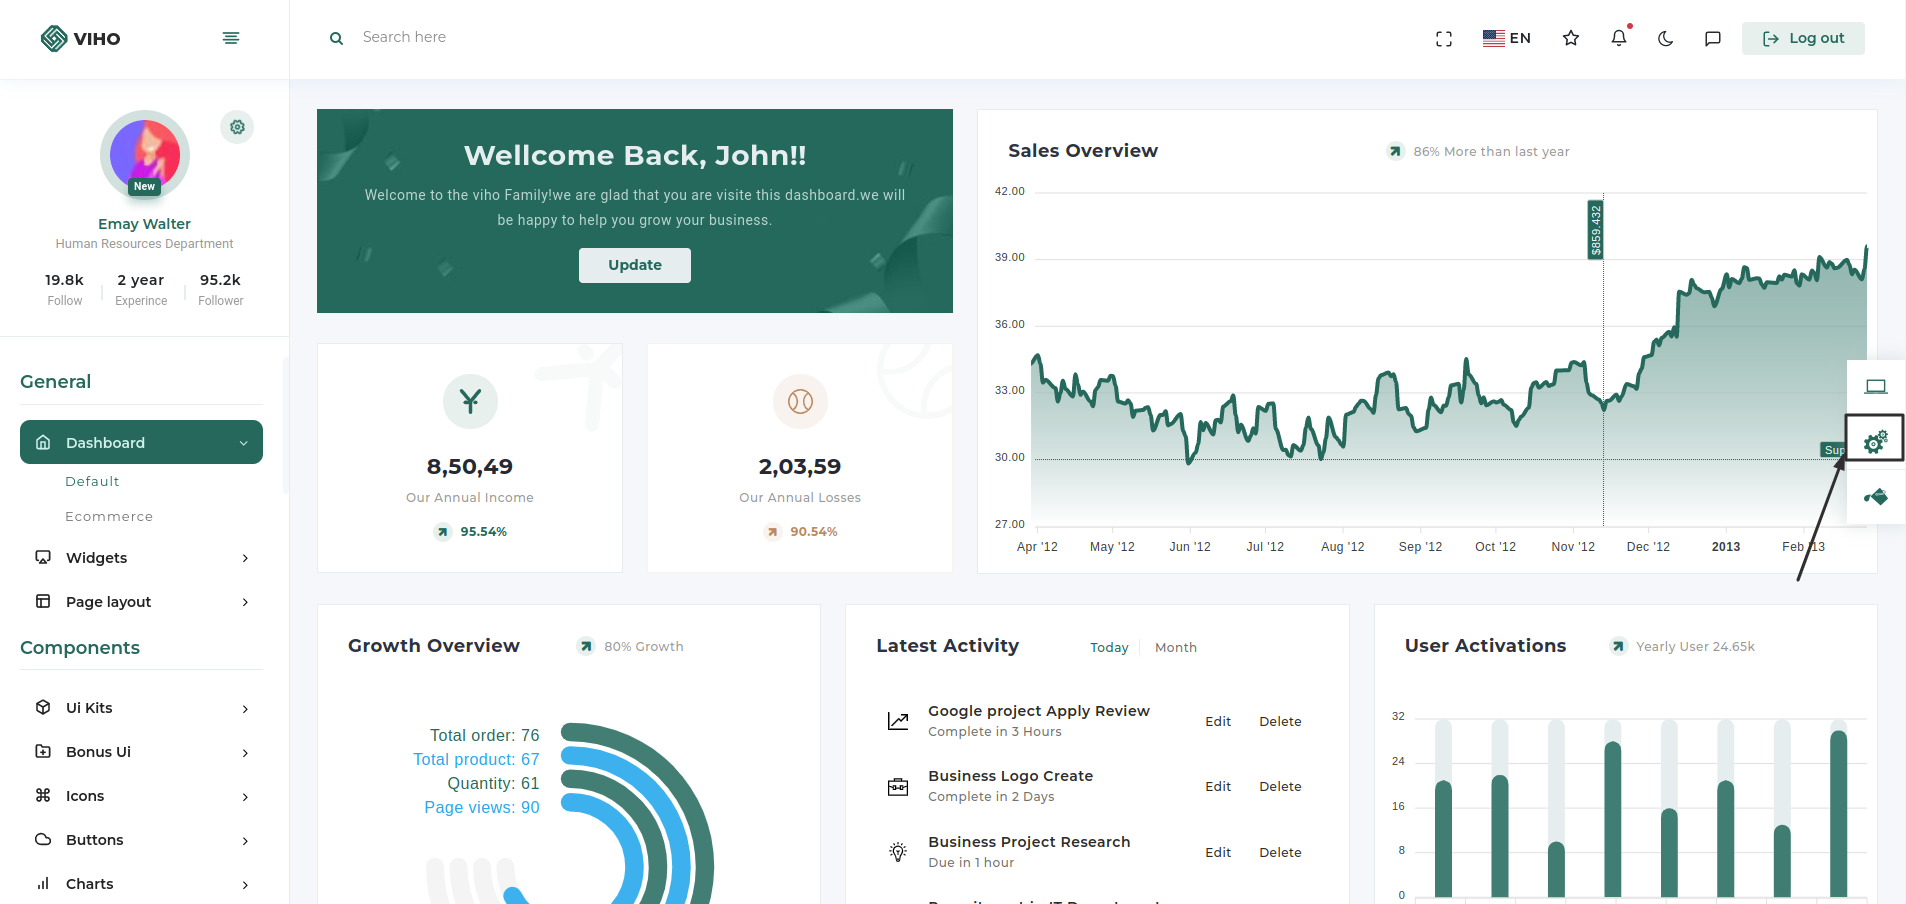
You can change your theme by clicking particular setting

Then you just need to click on configuration button
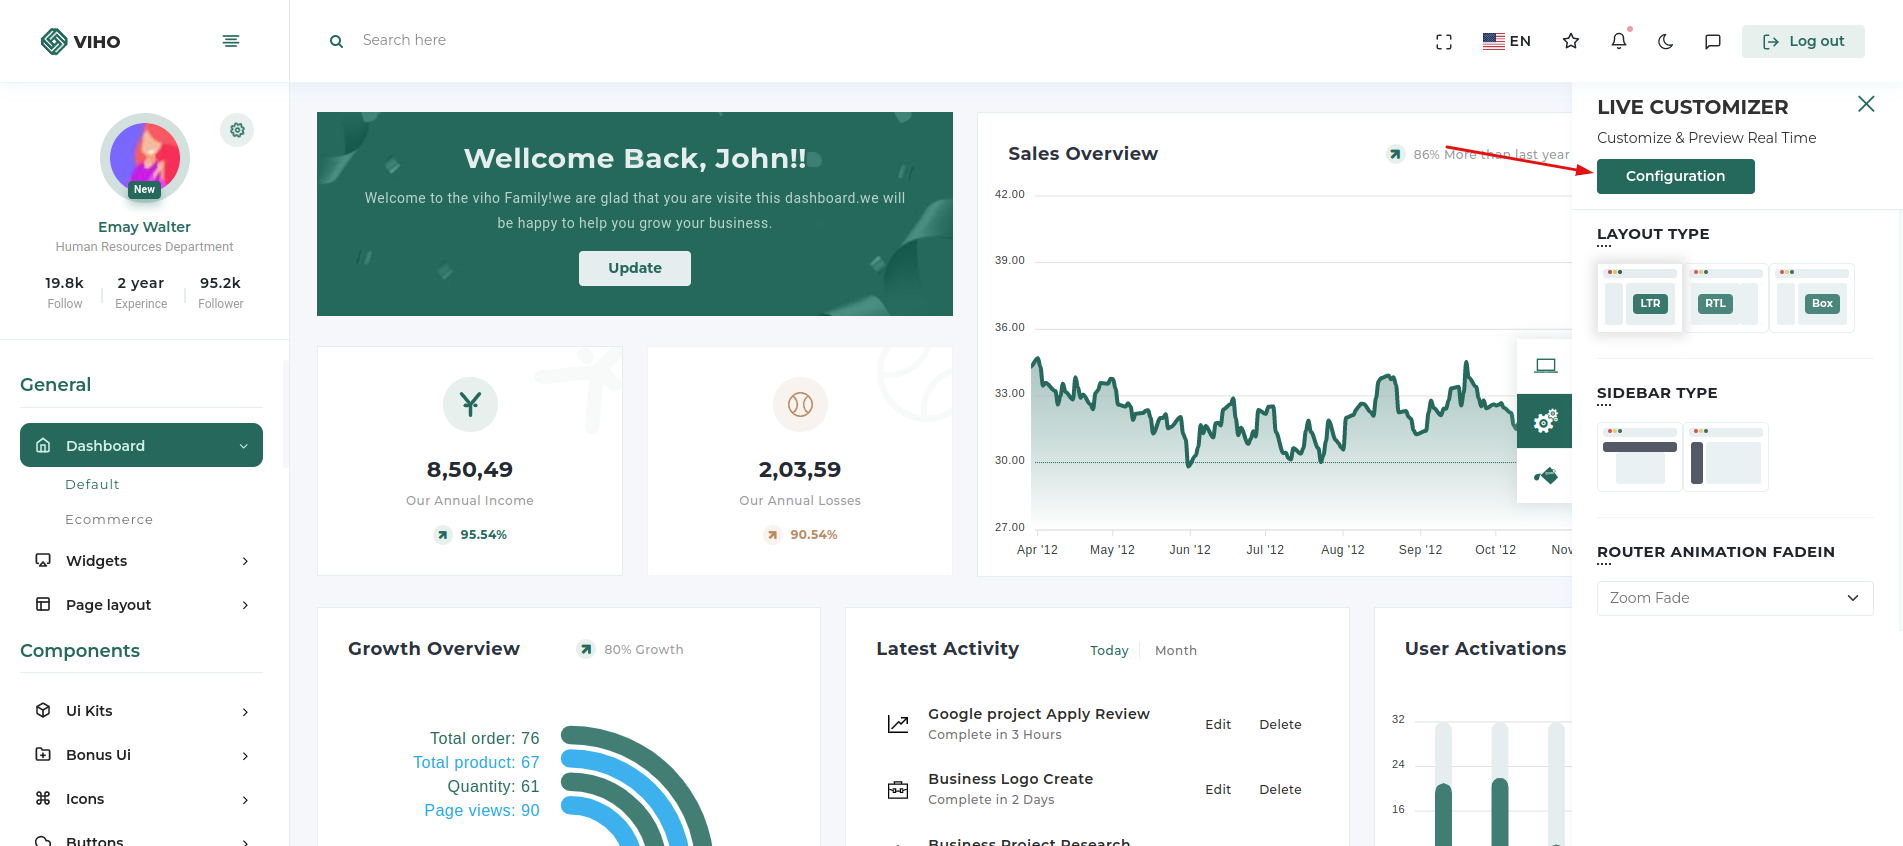
Configuration popup will be open then just click on copy json button which will copy configuration of theme which you want
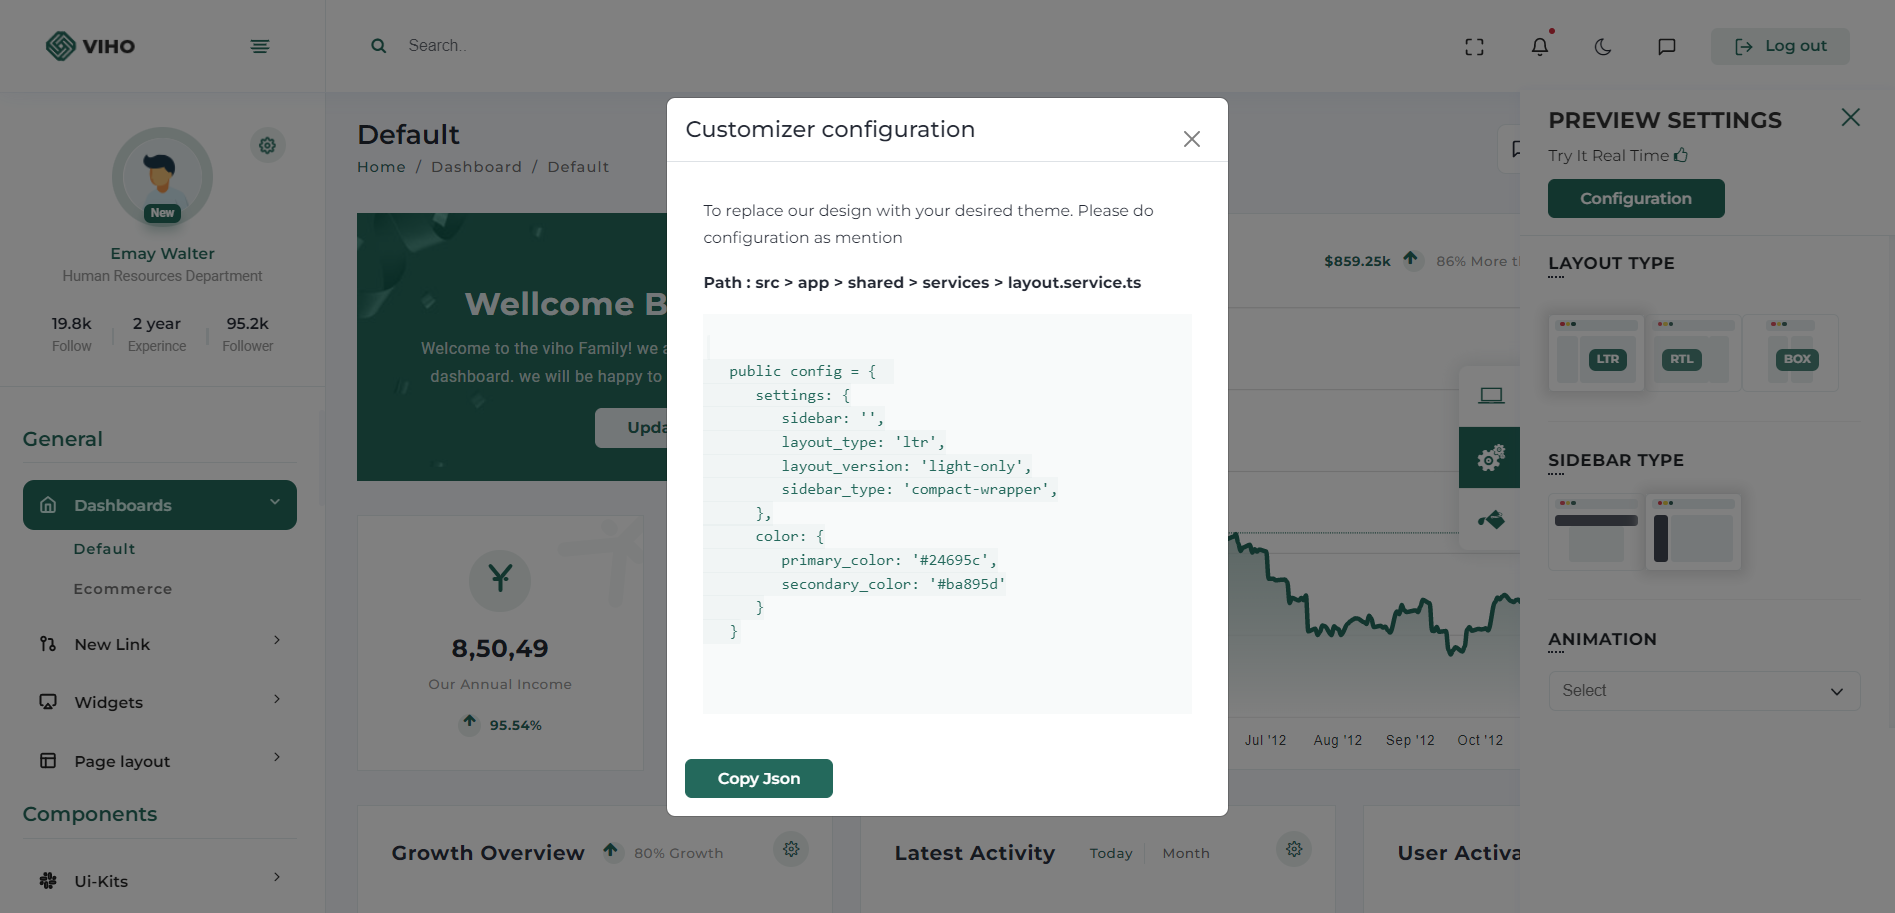
Now go to our theme >> src >> app >> shared >> services >> layout >> layout.service.ts and then just replace complete layout.service.ts with your new configuration and re-run theme using ng serve.
public config = {
    settings: {
        layout: '',
        layout_type: 'ltr',
        layout_version: 'light-only',
        sidebar_type: 'compact-wrapper',
    },
    color: {
        primary_color: '#24695c',
        secondary_color: '#ba895d'
    }
}
As we have given amazing layouts by adding them in URL so you just need to add your choice name layout in URL and you have that with you
ex. if you want to change dubai layout https://react.pixelstrap.com/viho/dashboard/default/Dubai with Singapore then you just need to update Dubai with Singapore like this https://react.pixelstrap.com/viho/dashboard/default/Singapore
Please refer the below table for corresponding classes. it is just for your inforamation you do not need to bother about this it's dynamically take particular classes according to your needs.
| Layout | Options |
|---|---|
| Boxed Layout | Class: box-layout |
| RTL Layout | Class: rtl |
| Light Layout | Class: light |
| Dark Sidebar | Class: dark-sidebar |
| Dark Layout | Class: dark-only |
Theme options
We have some inbuilt themes for sidebar that can be switched with just a class change
| Sidebar | Options |
|---|---|
| Horizontal Sidebar type | Class: "page-wrapper horizontal-wrapper" and "page-body-wrapper horizontal-menu" |
| Compact Sidebar | Attribute: sidebar-layout="compact-sidebar" |
| Modern Sidebar | Attribute: sidebar-layout="modern-sidebar" |
| Router Animation | Options |
|---|---|
| Select Animation type | isRight, isLeft |
RTL
Suppose you want to add RTL in your application then you just need to set "layout_type" as RTL so application will be converted in RTL layout.
Suppose you want to change Colors from config.jsx then you have to first clear localStorage then you will get your color in theme.
public config = {
    settings: {
        layout: '',
        layout_type: 'rtl',
        layout_version: 'light-only',
        sidebar_type: 'compact-wrapper',
    },
    color: {
        primary_color: '#24695c',
        secondary_color: '#ba895d'
    }
}