Firebase
Basically Firebase use for:
Email and password authentication with Firebase,
Social authentication with Facebook and Google, Twitter etc..
Manage Complete Database on Cloud
Hosting
Password recovery,
Verification emails,
Storing and accessing the authentication state using the browser's localStorage
There are also many other use of firebase that you can find from reference which we have attach below.
Prerequisites
You must have the following prerequisites:
Recent versions of Node.js and NPM. You can install them from their official website,
Angular Cli installed (npm install -g @angular/cli)
Let's follow below step to secure your application
Step 1:
-
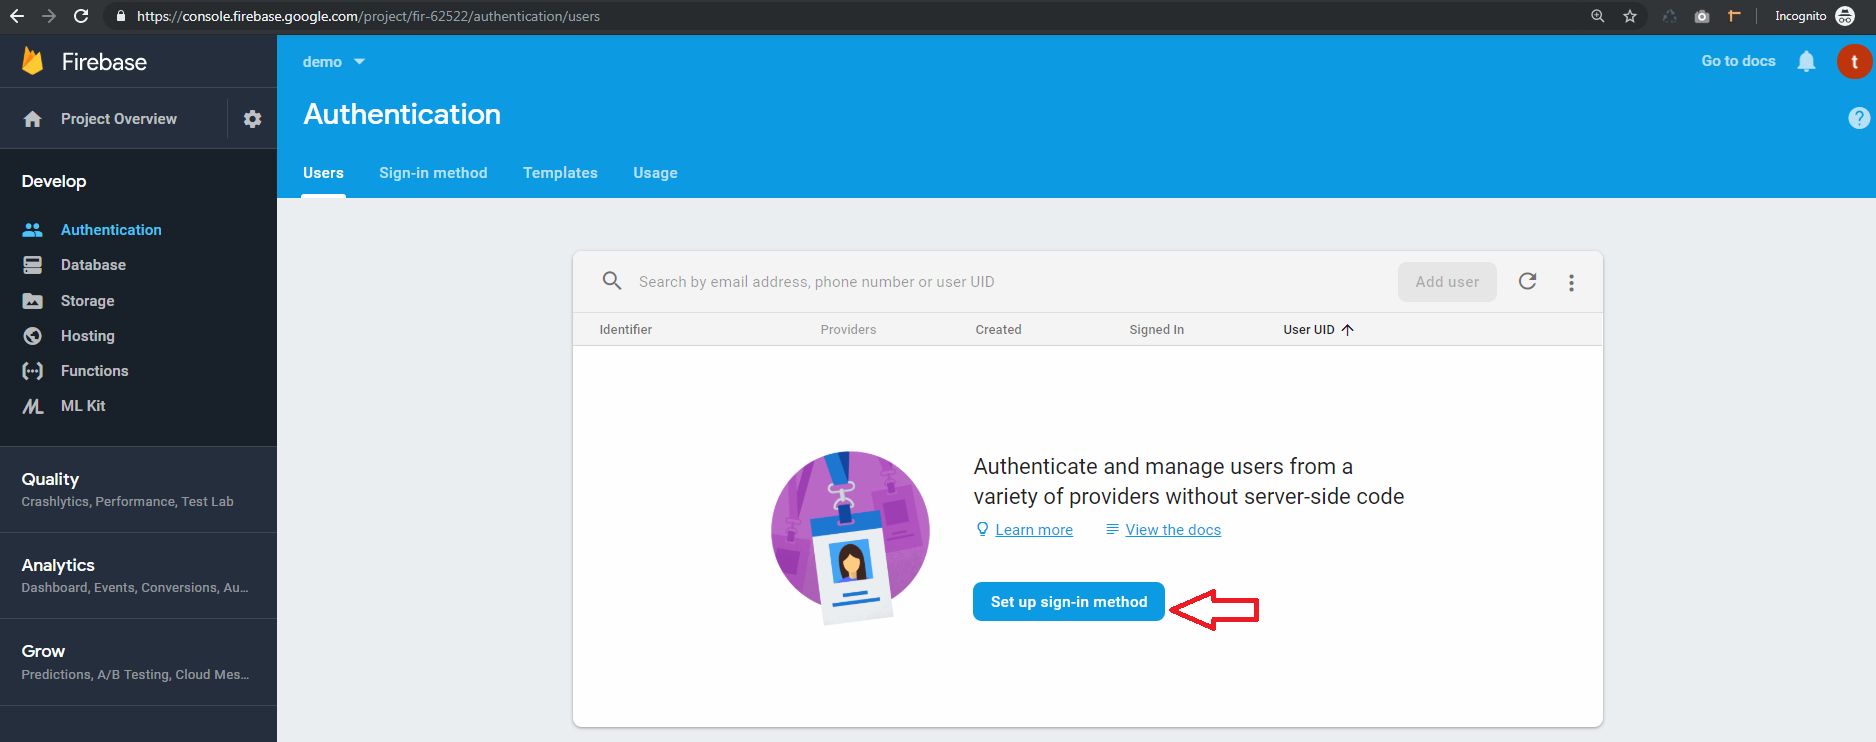
1. setup firebase project in firebase console.
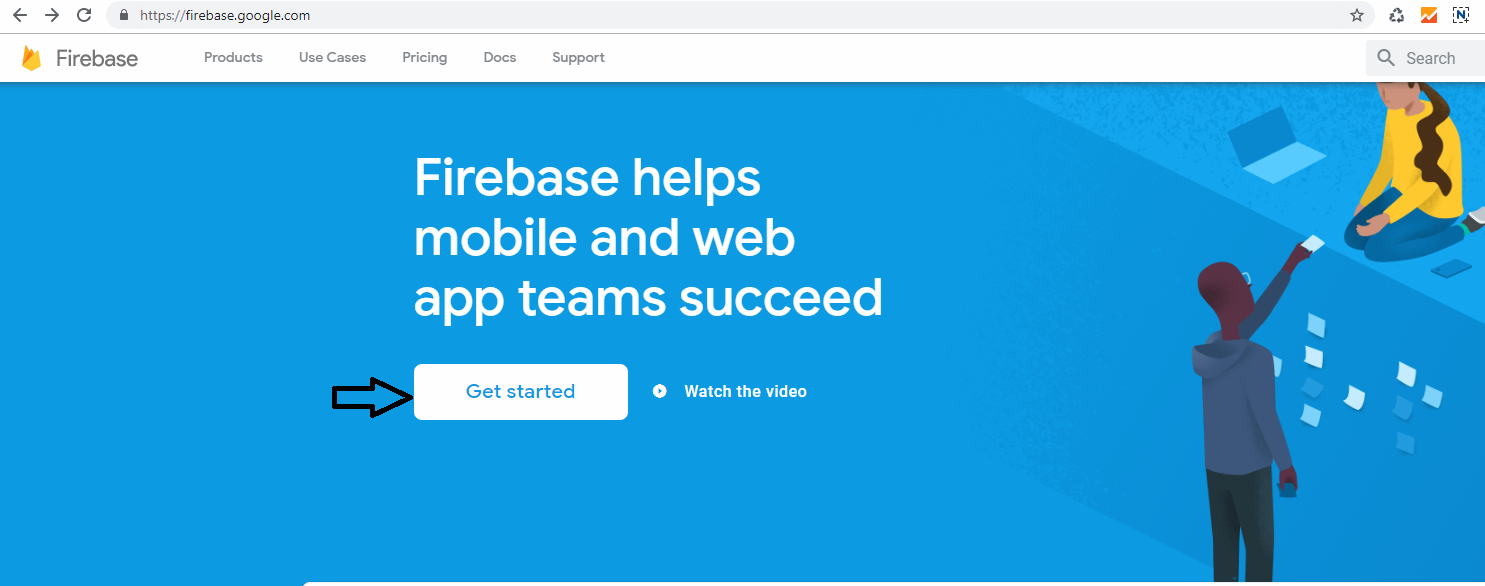
click on Get Started button
-
2. Add new project
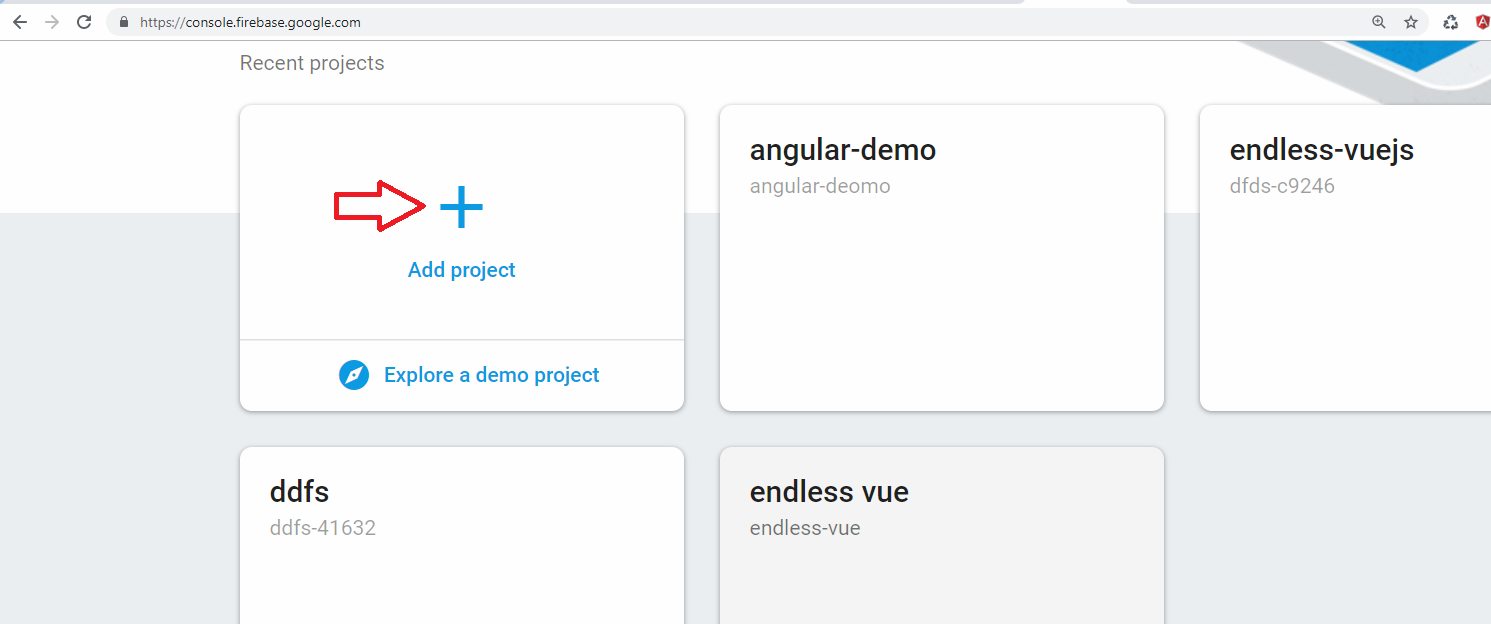
create new project
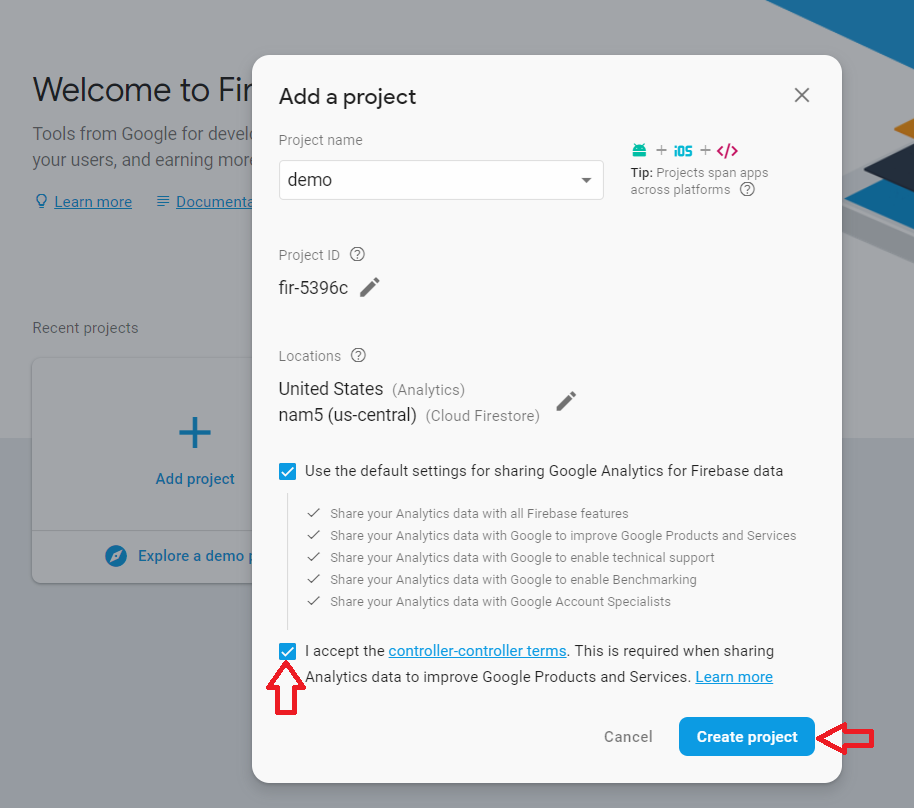
Accept the controler-terms and click on Create Project
-
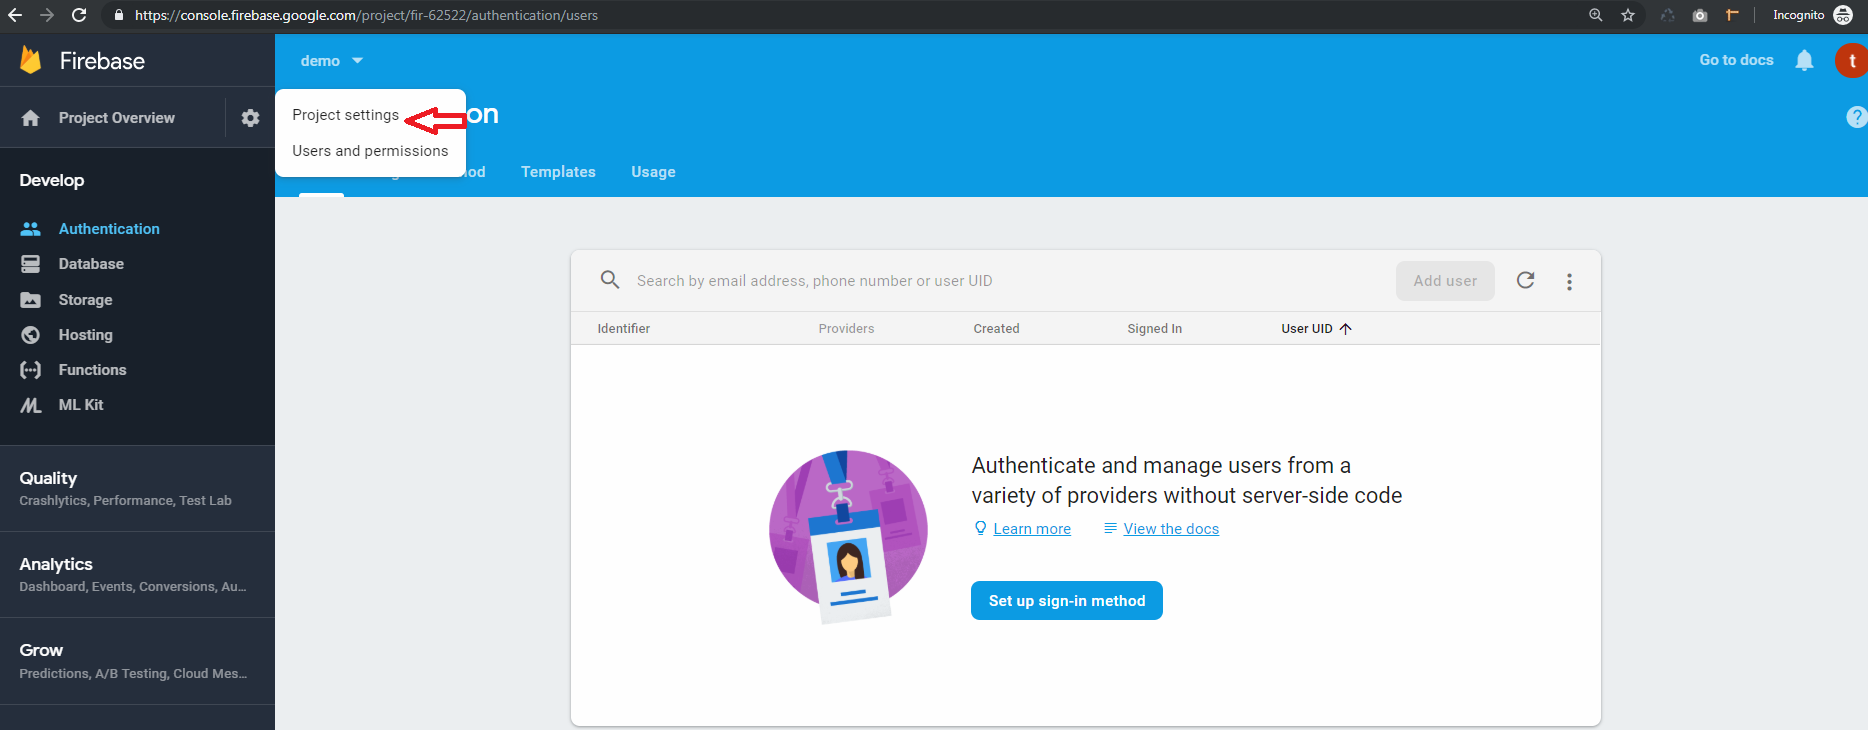
3. Go to Develop > Authentication
-
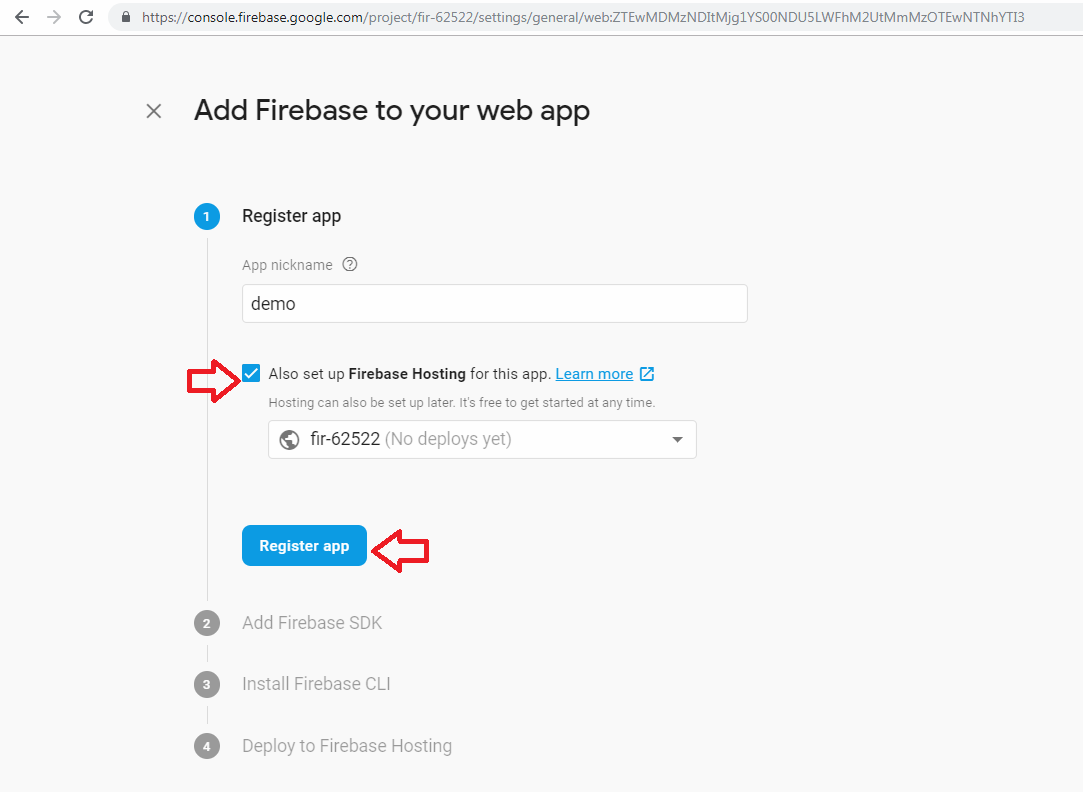
4. Get config object for your web app
To get the config object for a Firebase Web App:
-
>> Click the Settings icon, then select Project settings.
-
>> Go to the web app

-
>> In Your apps card, select the nickname of the app for which you need a config object.
-
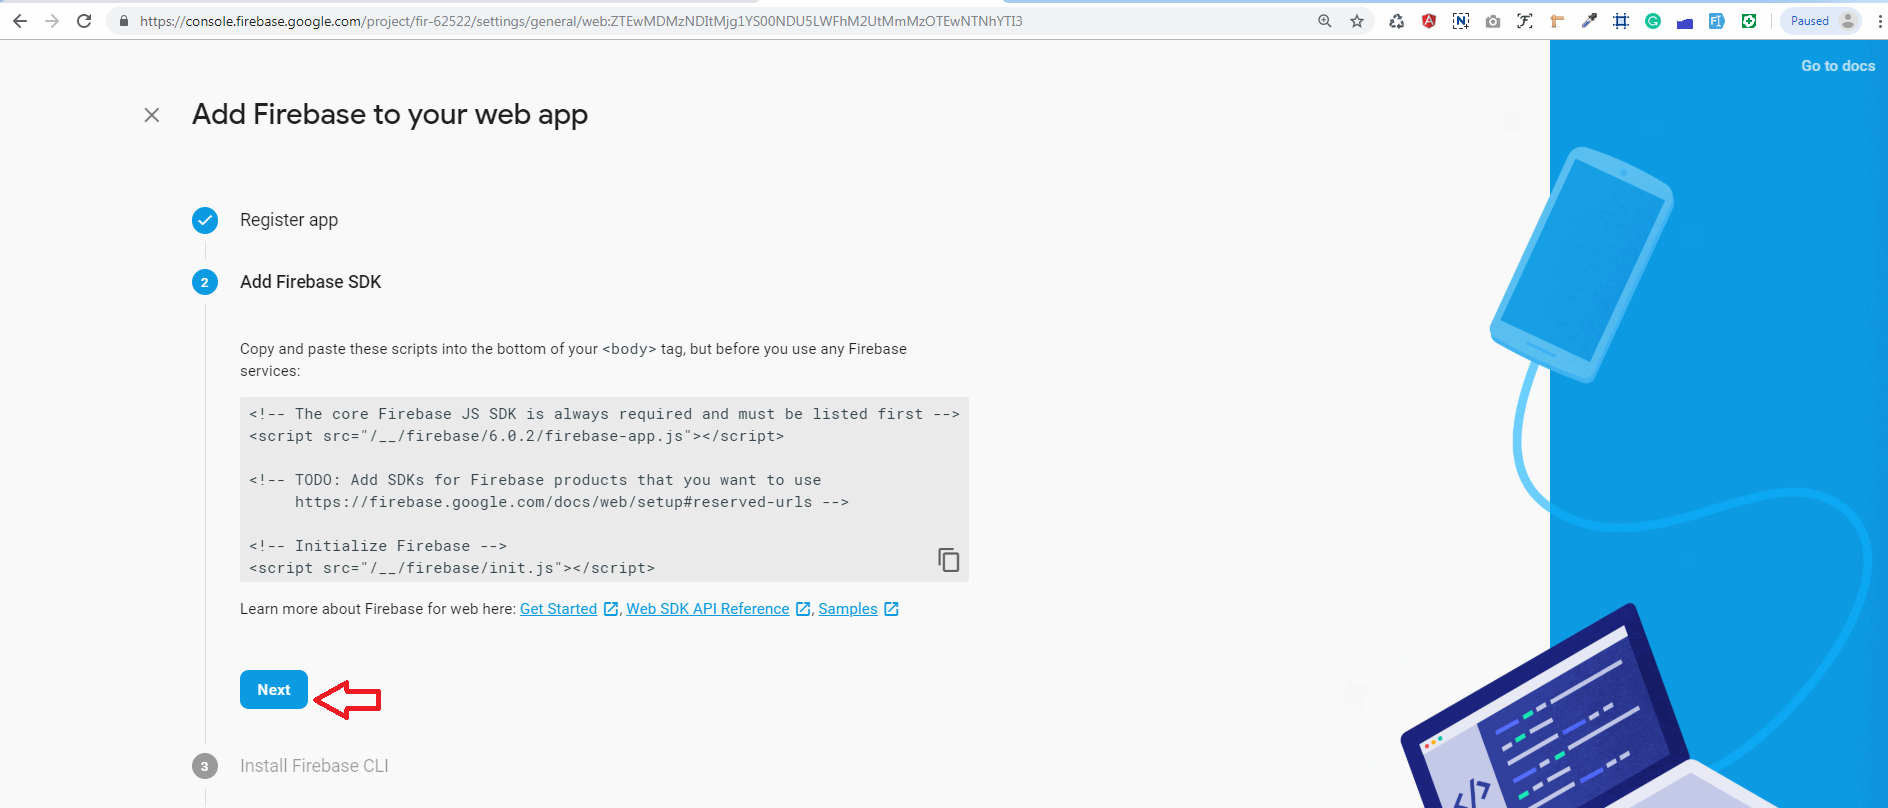
>> Select Config from the Firebase SDK snippet pane.

-
>> Copy the config object snippet, then add it to your app's HTML.
copy config add on config.txt
-
-
5. Next, you'll need to enable Email authentication from the authentication > Sign-in method tab:
-
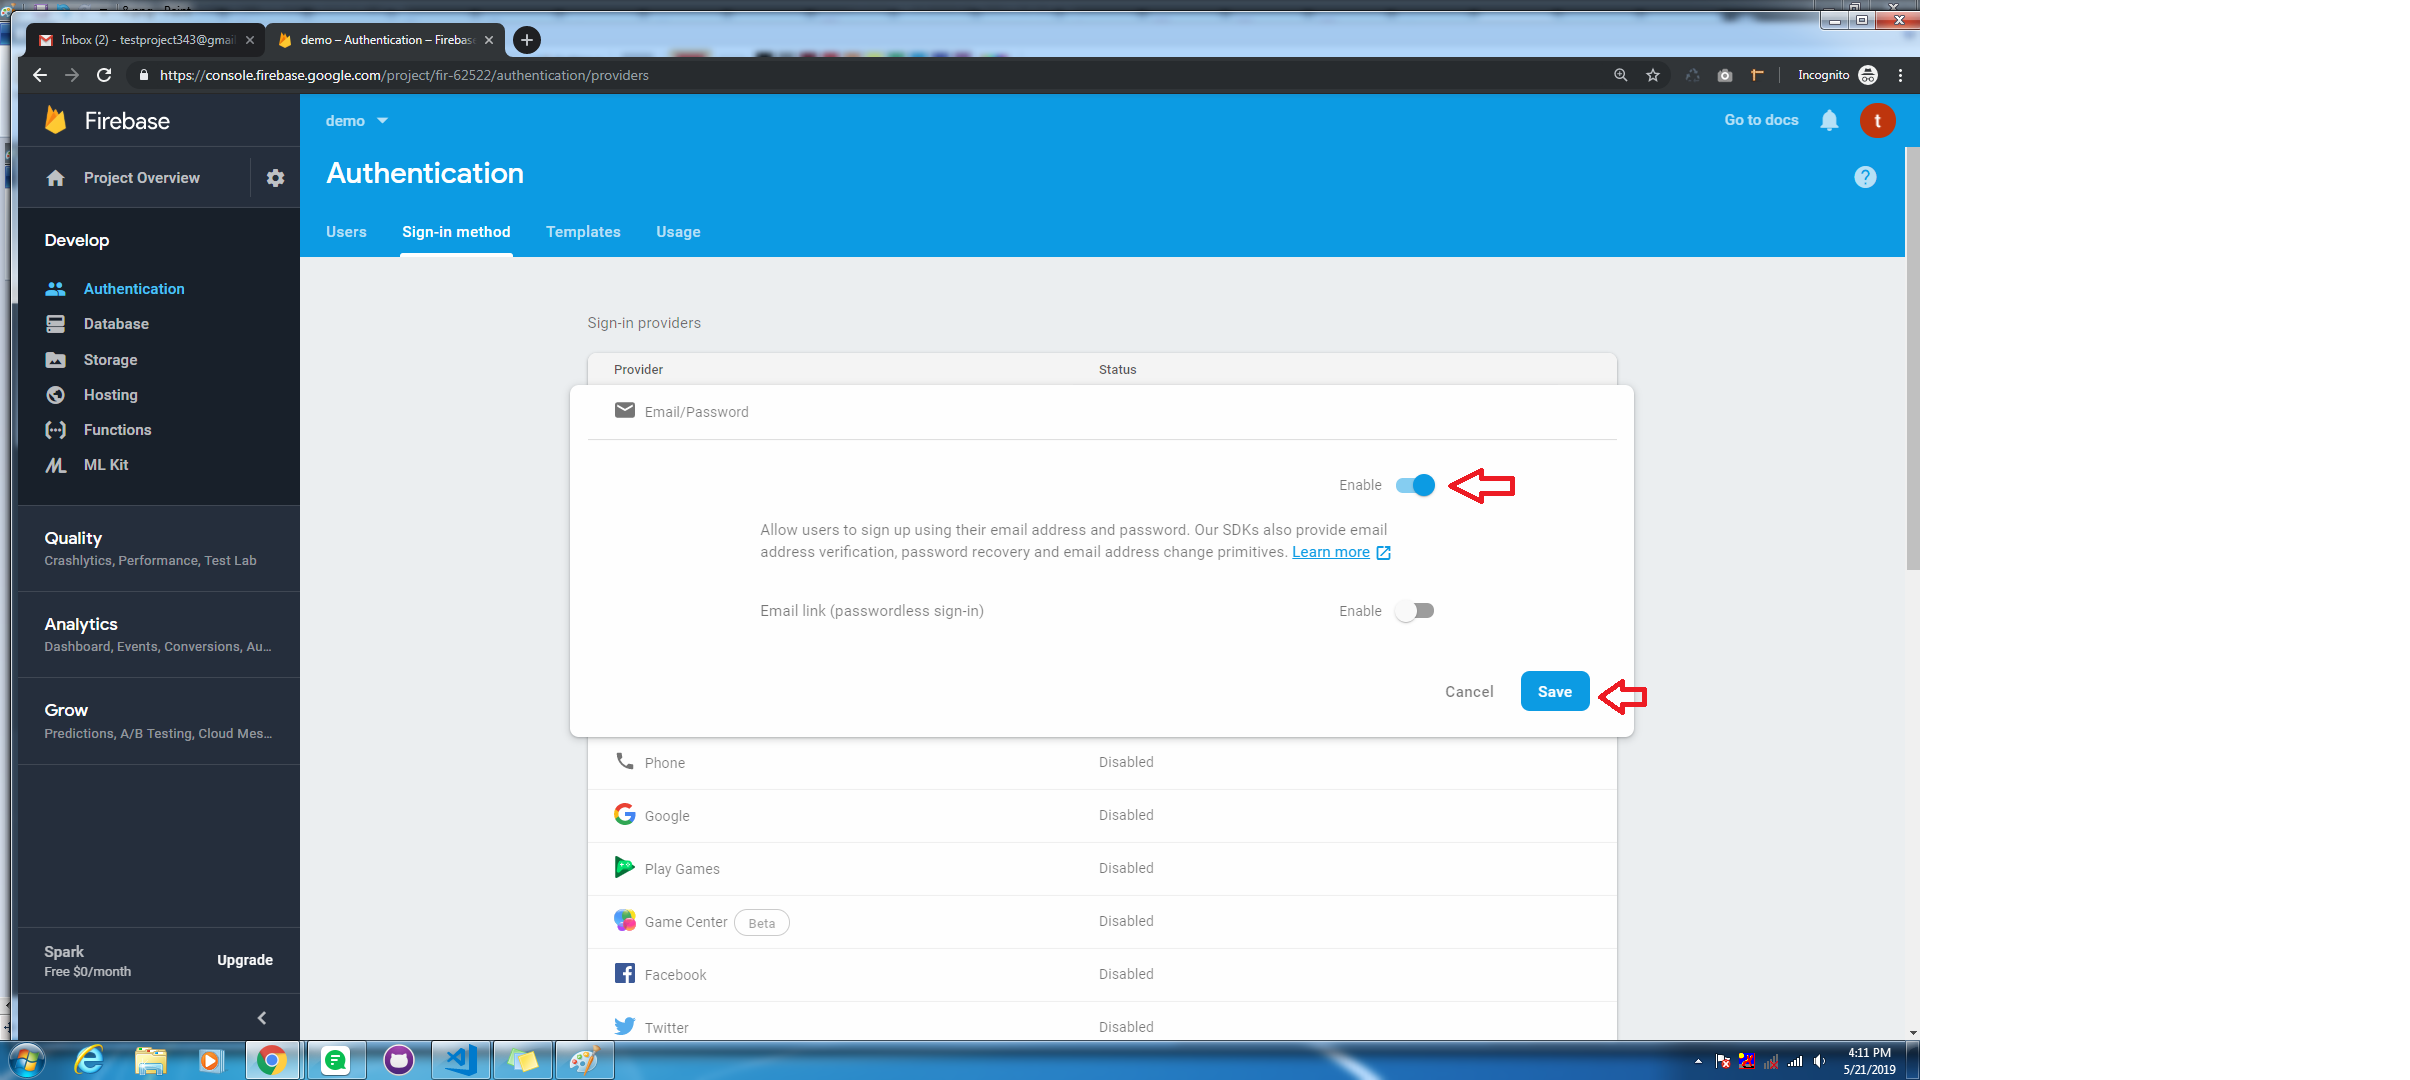
6. go to sign in method
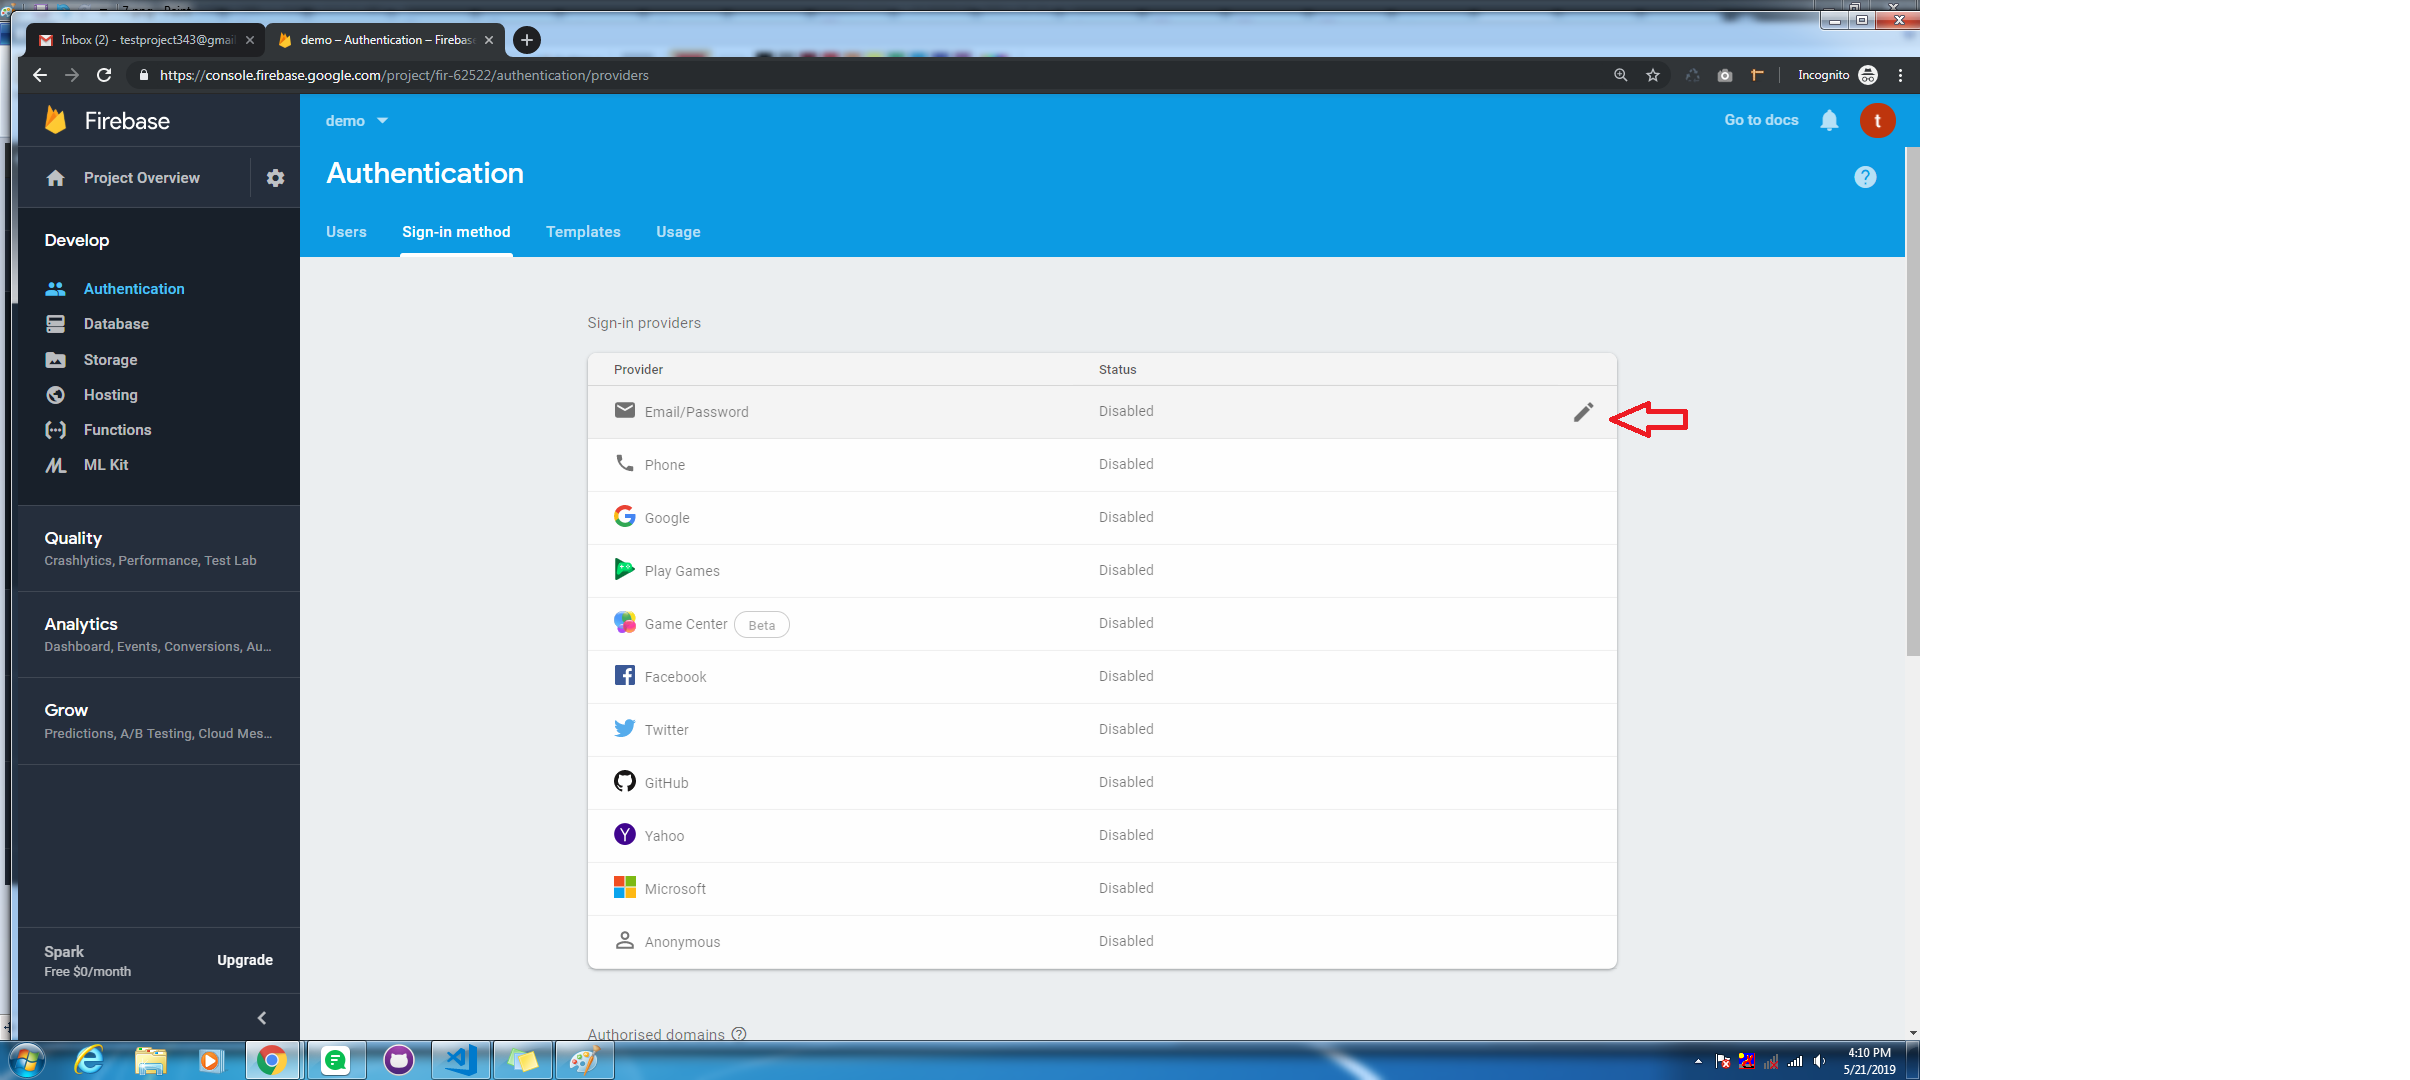
Make disble toggle to enable, and save changes

-
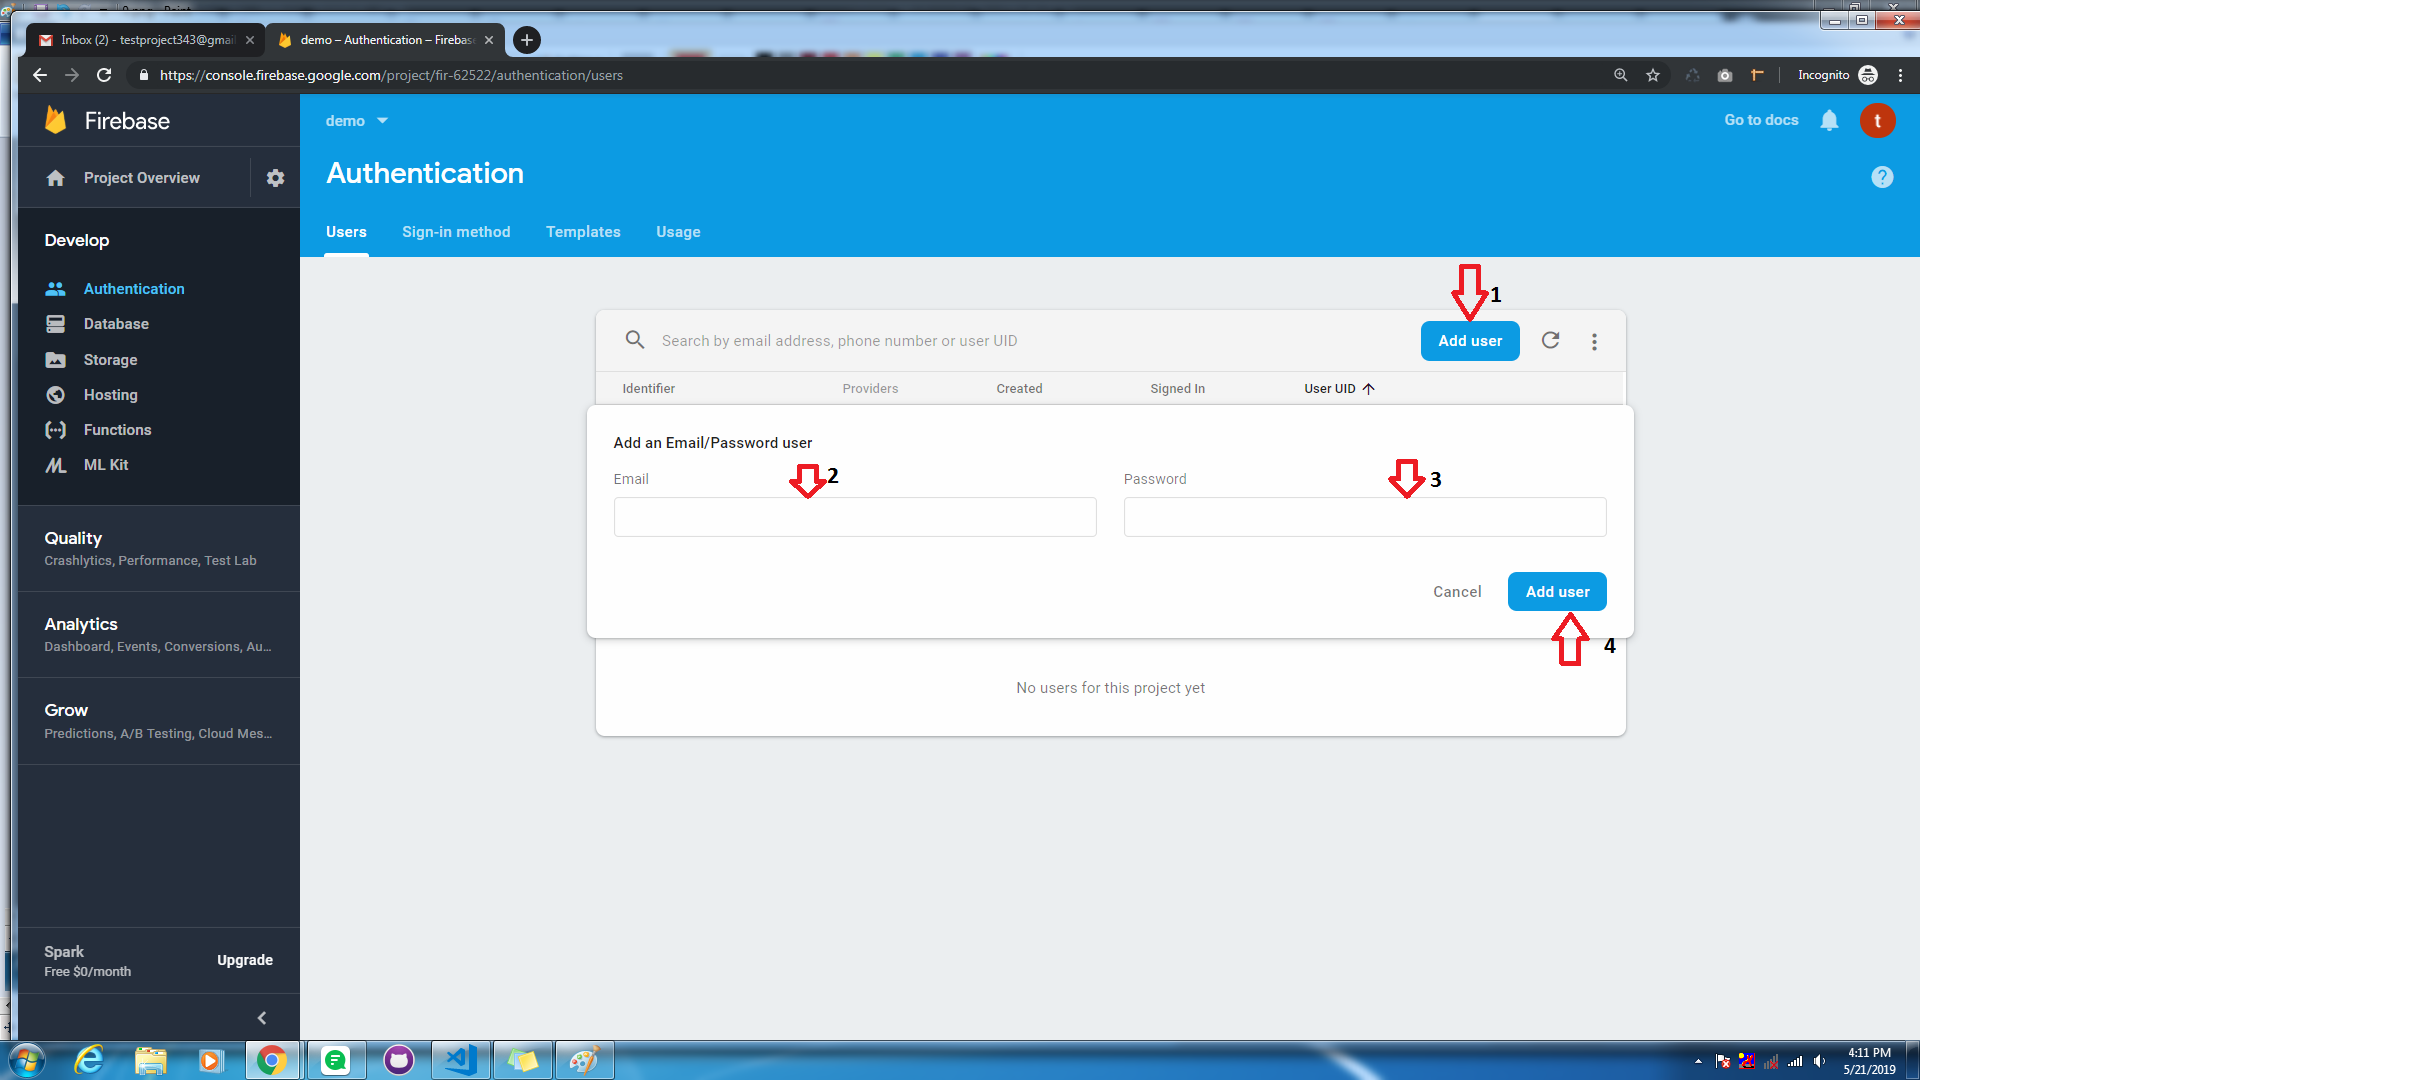
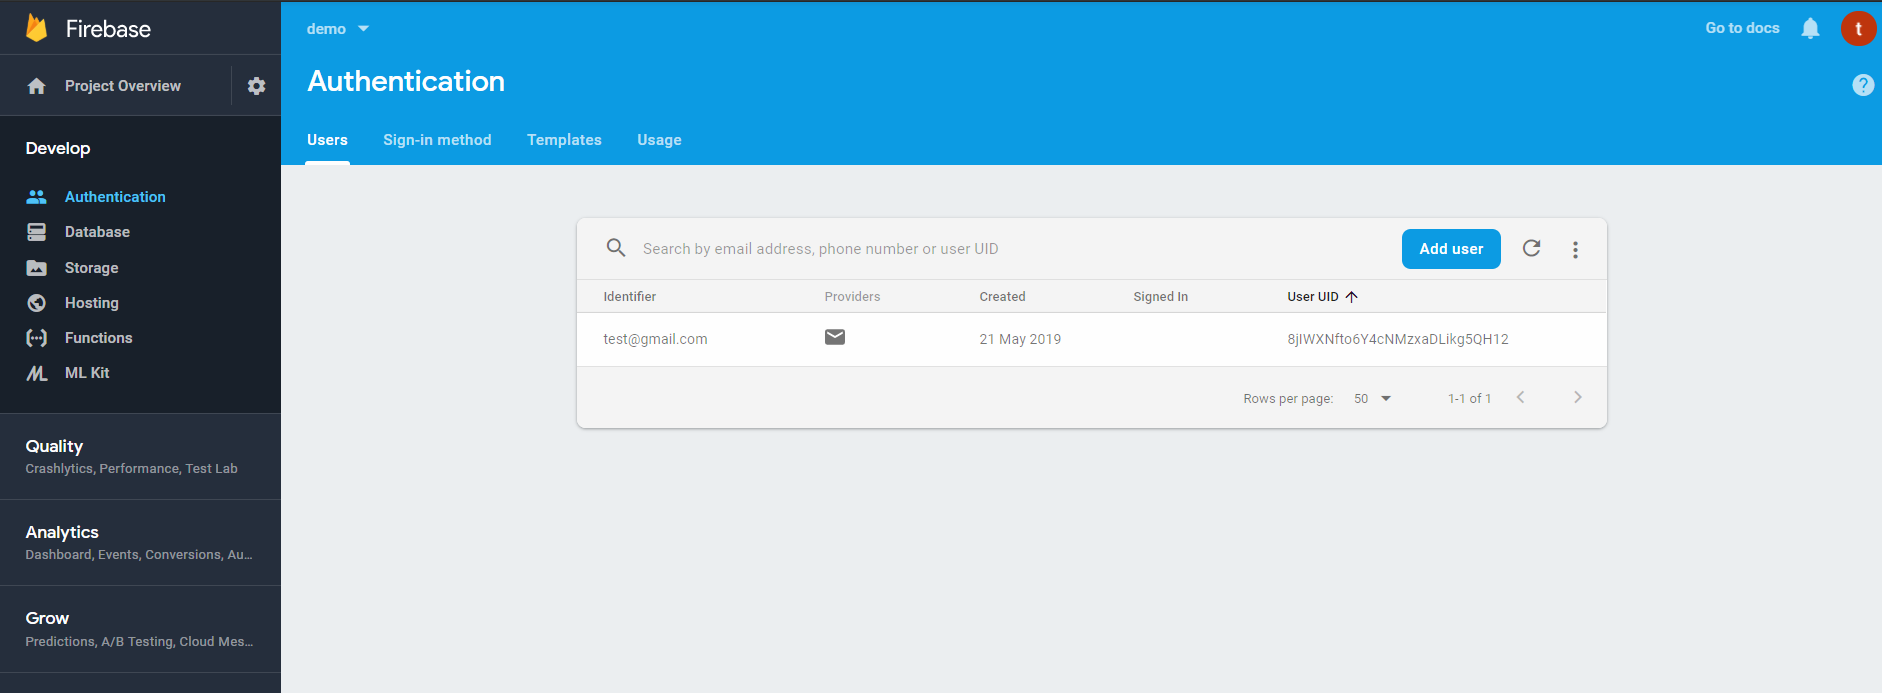
7. Go to the authentication > Users tab then click on the Add user button and genarate email and password:
Step 2:
-
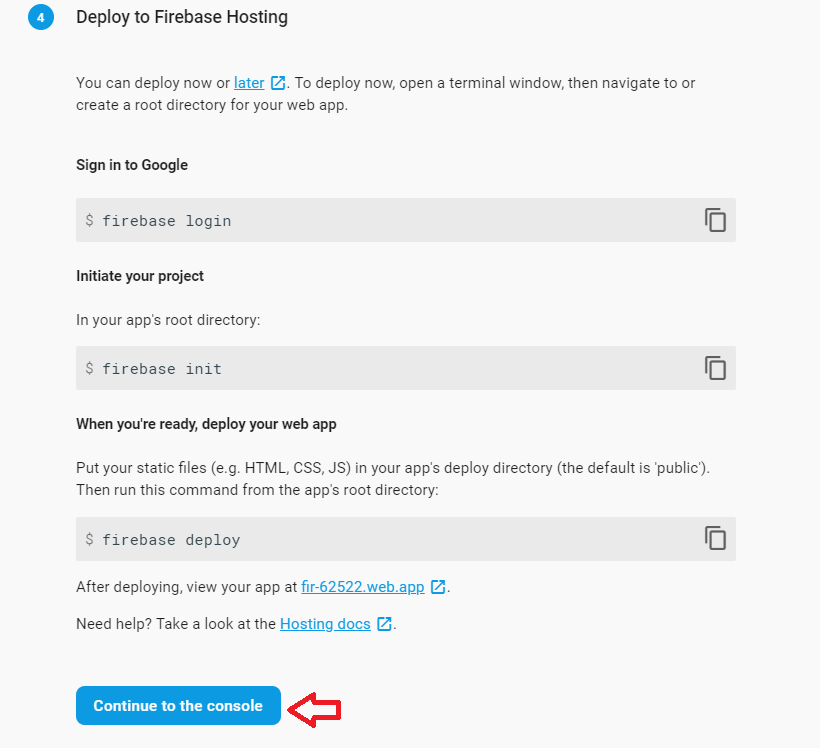
1. Installing Firebase in Angular
npm install ——save firebase -
2. Go to main.js file and import firebase and in config.json file.
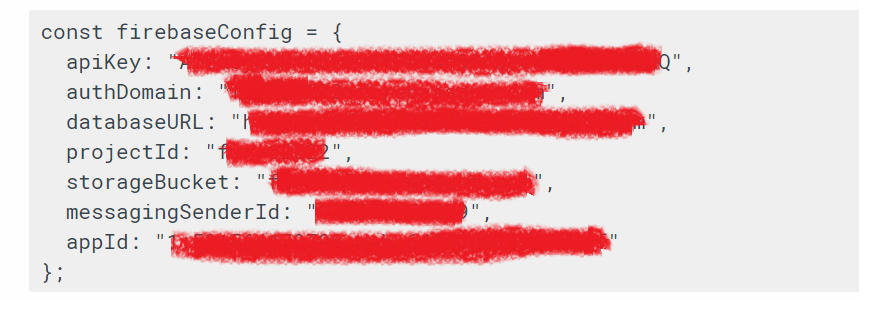
import firebase from 'firebase/app';

import config from './config.json'

firebase.initializeApp(config.firebase);

export const db = firebase.firestore();
you can just paste your firebase credential in your config.json file which is in src >> config.json.
"firebase":{ "apiKey": "YOUR API KEY", "authDomain": "YOUR AUTH DOMAIN", "databaseURL": "YOUR DATABASE URL", "projectId": "YOUR PROJECT ID", "storageBucket": "YOUR STORAGE BUCKET", "messagingSenderId": "YOUR MESSAGE SENDER ID" } -
3. In Routing index.js place following code for restricated use to open a admin theme without login
router.beforeEach((to, from, next) => { firebase.auth().onAuthStateChanged(() => { if(to.meta.title) document.title = to.meta.title; const CurrentUser = firebase.auth().currentUser; const path = ['/auth/login','/auth/register']; if (path.includes(to.path) || to.path === "/callback" || CurrentUser || Userauth.isAuthenticatedUser()){ return next(); } next('/auth/login') }); }); -
4. Generate components in auth folder called Login and Register and use firebase in Login and Register component according to your needs.
- Supplemental
How to remove the firebase from cuba theme ?
-
1. Remove Import statement and configuration of firebase from your main.js also remove firebase json from config.json which is in src >> config.json
import firebase from 'firebase/app'; import config from './config.json' firebase.initializeApp(config.firebase); export const db = firebase.firestore(); -
2. Remove code from route >> index.js which is for restricating user to directly use dashboard without login
If you don't want to remove auth0 then just remove firebase part
router.beforeEach((to, from, next) => { firebase.auth().onAuthStateChanged(() => { if(to.meta.title) document.title = to.meta.title; const CurrentUser = firebase.auth().currentUser; const path = ['/auth/login','/auth/register']; if (path.includes(to.path) || to.path === "/callback" || CurrentUser || Userauth.isAuthenticatedUser()){ return next(); } next('/auth/login') }); }); -
3. Remove all methods called Google, Facebook and others which is created for that particular social media login and just use simple login page, and on click of login just redirect to dashboard.And if you don't want to use login also just remove complete auth folder